Installing A Drop Ceiling In A Finished Basement
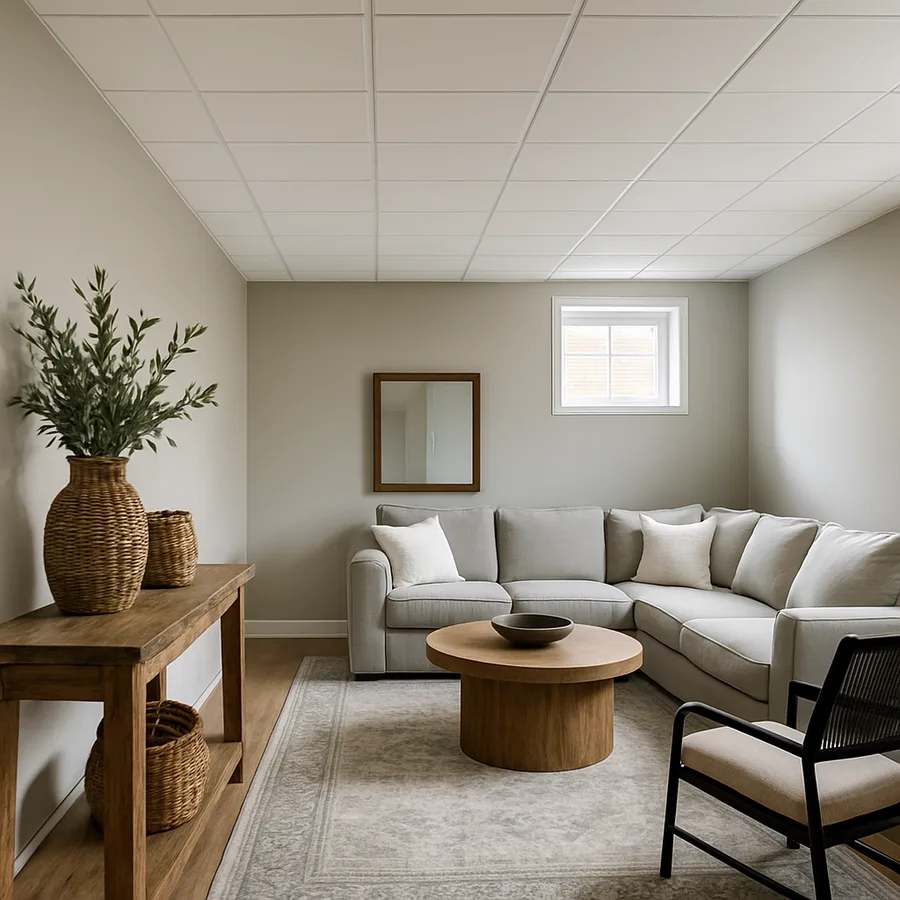
Finished basements account for roughly 22 percent of all remodeling permits filed in the United States each year, and inside almost every one of them lives the same design headache: a bare joist bay tangled with copper supply lines, PVC drains, ductwork, low-voltage cable, and the occasional wandering gas line. A drop ceiling, more formally called a suspended acoustical ceiling, solves the problem without permanently burying any of it. The 2024 International Residential Code (IRC) sets a minimum finished basement ceiling height of 7 feet under Section R305.1, with a 6 feet 4 inch clearance allowed under beams, ducts, and structural elements. That two-inch buffer is exactly where a well-planned grid earns its keep.
You will finish this project with a serviceable ceiling that hides the mechanical chaos overhead, absorbs some of the boomy echo basements are known for, and grants you a swing-open access point at every single tile. The trick is respecting the geometry: the grid has to be level within one-eighth inch across the entire room, the perimeter has to look intentional rather than cobbled, and the tiles have to sit flat with clean reveals. Get the layout right on paper and the install goes fast; skip that step and every cut fights you.
Measure Your Basement Ceiling Height
Grab a rotary laser level or a good 6-foot spirit level and shoot the perimeter of the room, marking the lowest point on any wall. Note the height of every duct, waste stack, and beam that dips below the joists. Your finished ceiling plane needs to sit at least 3 inches below the lowest obstruction to give room for tile removal, and 4 inches is more comfortable. Standard 15/16 inch main tees drop about 4 inches from the joists once the hanger wire is trimmed.
Do the math before you commit. If your joists sit at 88 inches from the finished floor and a heat trunk drops to 84 inches, a ceiling installed 4 inches below the trunk lands at 80 inches - comfortably above the 76 inch IRC minimum at that soffit and well above the 84 inch general room requirement. If you cannot make the math work, plan a soffit around the offending duct rather than dropping the entire ceiling to meet it. A localized soffit almost always beats a room-wide compromise.
Sketch a scaled floor plan on quarter-inch graph paper before you buy anything. Mark every column, every mechanical drop, and every wall angle change. This drawing is the document you will reference three or four times per hour during the install. If you skip it, you will end up with a tiny sliver tile at one wall and a full tile at the opposite wall, which reads as sloppy the moment anyone walks into the room.
Choose Your Grid Type And Panels
Suspended ceiling grid comes in three profile widths: 15/16 inch (standard), 9/16 inch (narrow, sometimes called slimline), and 1/2 inch (bolt-slot systems for exposed structure work). For a residential basement the 15/16 inch profile handles best and forgives small alignment errors that a slimline grid will magnify. Buy one brand of grid for the entire room - Armstrong Prelude, USG Donn DX, and CertainTeed all fit their own tiles well but do not always mate perfectly with one another.
Panel selection matters more than most homeowners realize. A 5/8 inch mineral fiber tile like Armstrong Fine Fissured delivers a Noise Reduction Coefficient (NRC) around 0.55, which noticeably calms basement echo without eating the budget. Vinyl-faced gypsum tiles wash easily but reflect sound, so they suit laundry areas better than TV rooms. If moisture is a concern near a bath group or a walkout door, choose a tile rated for high humidity - most manufacturers publish a sag-resistance number and a humidity ceiling around 90 percent relative humidity.
Order 10 percent extra tile and about 5 percent extra grid. Damage happens during the cuts, and a partial tile that broke along a fissure line is impossible to make invisible in a finished room. The ENERGY STAR product finder lists ceiling-compatible LED flat panels that drop into standard 2x2 or 2x4 openings - worth checking before you buy fixtures, since a well-chosen flat panel eliminates the need for separate can lights.
Snap The Wall Angle Perimeter
Determine your finished ceiling height and mark it on one wall with a laser or a water level. Snap a chalk line all the way around the room at that mark. Every single wall angle bracket rides on this line, so accuracy here dictates whether the finished grid reads flat or sloped. Use a fresh chalk box loaded with blue chalk - red never comes off drywall cleanly.
Fasten the wall angle with 1-1/4 inch drywall screws driven every 16 inches into studs or drywall anchors. Miter the outside corners at 45 degrees and overlap the inside corners with a straight cut so one leg buries under the other. If your walls are furred concrete, use 1-1/4 inch masonry screws and pre-drill with a hammer drill. Skip the temptation to nail-shoot the angle into concrete - the shock can crack older block and the fastener is nearly impossible to remove if the line was off.
Before you leave this stage, verify with a laser that the wall angle is flat to itself all the way around. A single low corner will pull the entire grid downward at that end of the room and every hanger wire on that side will need to compensate. Fix the angle now, not later.
Suspend The Main Runners And Tees
Main runners carry the load and always run perpendicular to the joists. Space them 4 feet on center and start the first main so the border tiles at each wall are equal in width - half a full tile is ideal, three-quarters is acceptable, less than 6 inches looks amateur. Snap parallel chalk lines on the underside of the joists to mark each main runner path.
Attach 12-gauge hanger wire to every joist along each main runner line, spaced no more than 4 feet apart. The Ceilings and Interior Systems Construction Association recommends wrapping the wire around itself at least three full turns and keeping the wire within 6 inches of vertical - a leaning wire transmits load to the joist as a horizontal pull the fastener was never designed to resist. Bend each wire 90 degrees at the height that corresponds to the top of the main runner slot.
Hang the main runners and level them across the room with a laser. Once the mains are level and locked to the wall angle, install 4-foot cross tees on 2-foot centers to divide each main-to-main bay into 2x2 grids, or install 4-foot cross tees on 4-foot centers if you chose 2x4 tile. The tees click into pre-punched slots on the mains - you should feel a positive snap. If a tee wobbles, the slot is bent and the tee needs to move to a different location.
Cross-check the grid diagonally with a tape measure. Every 2x2 opening should measure the same corner to corner. A grid that is out of square will fight every tile drop-in for the rest of the install.
Drop In Tiles And Cut Around Obstacles
Wear clean cotton gloves while handling tiles. Skin oils leave fingerprints on mineral fiber faces that never come off, and one careless handoff will ruin a $12 panel. Tilt each tile diagonally through the opening and let it settle onto the tee flanges. If the tile does not sit flat, the grid is slightly bowed at that point - check for a stray hanger wire that is holding tension unevenly.
Cut tiles with a fresh utility knife and a straightedge on a smooth work surface. Score the face side first, then flip and snap along the score. For circular cuts around sprinkler heads or drop cords, use a rotary tool with a mineral-fiber cutting bit. Any cut edge that sits on a wall angle will read as a rough edge from the room; use the factory edge inward whenever possible so the cut side hides at the wall.
Trim the tiles around HVAC boots, sprinkler penetrations, and light fixtures with a template made from cardboard first. It is much cheaper to trash a piece of cardboard than to trash a tile. The National Fire Protection Association's NFPA 13 sprinkler standard requires unobstructed clearance around sprinkler heads, so verify the escutcheon plate sits flush with the finished ceiling plane before locking each fixture in place.
Reserve a few full tiles for future access. Label them on the back with the room and the date so a plumber or electrician five years from now knows which panels are safe to lift and which sit under a fixture that needs to be dismounted first. Small courtesies like this earn goodwill from every trade that comes after you.
Wrapping Up Your Project
Step back into the doorway once every tile is in place and look at the ceiling the way a guest will see it. Check for tiles that sit low on one edge - usually a hanger wire needs a quarter turn - and for cross tees that did not fully seat. Walk each row with a flashlight held at an angle; a raking light reveals dust, fingerprints, and misalignments the naked eye misses under normal room light.
Take one final measurement across the room and confirm the ceiling remains at your target height at both ends and in the middle. If a light fixture opening looks tight against a tile edge, loosen it and re-center rather than living with the asymmetry - you will see that error every time you enter the room.
Vacuum the top of the grid before you consider the job done. Dust that lands on the mineral fiber during install becomes permanent within a month as the tiles absorb ambient humidity. A soft brush attachment on a shop vacuum, run gently along each tee, removes 90 percent of the debris and gives the ceiling a crisper look under LED lighting.
File your permit final inspection paperwork with the local building department. Most jurisdictions consider a suspended ceiling a finish material rather than structural work, but any electrical fixtures or sprinkler modifications require sign-off. Save the receipts, the grid schematic, and the tile SKU - future you will thank present you when a leak stains one panel and needs a matching replacement. The ceiling you just installed should serve reliably for 20 years or more, absorb sound, hide the mechanical layer, and stay easy to open at any point.
More Articles You May Like



Comments
Post a Comment