How To Install Overhead Garage Storage Racks Safely
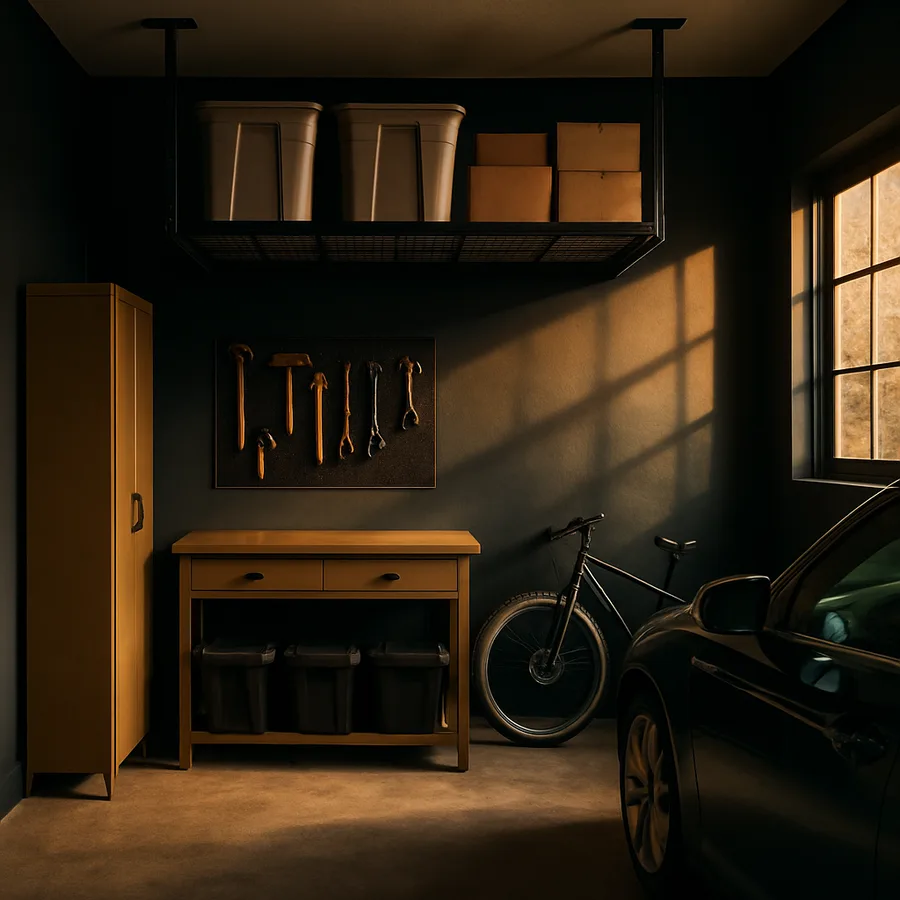
The average two-car garage holds roughly 4,500 pounds of accumulated stuff, and most of it lives on the floor, on wobbly shelving, or crammed against the walls. Overhead ceiling racks pull that clutter into the dead zone above your vehicle, freeing 40 to 60 square feet of usable floor area in a typical installation. The catch is that a fully loaded rack can weigh 400 to 600 pounds, so mistakes during installation do not just risk damaging your car. They risk dropping half a ton on someone's head. Overhead racks fail almost exclusively from installation errors, not product defects.
This walkthrough treats the job as a structural project rather than a shelving exercise. You will learn how to verify your ceiling can carry the load, how to locate joists reliably, which lag bolts and washers actually meet the manufacturer's rated capacity, and how to test the assembly before you trust it with your tools. The details are technical because they need to be. A rack rated for 600 pounds only holds 600 pounds when every fastener hits solid framing and every torque spec is respected. Skip a step and the number on the box becomes meaningless.
Assess Your Ceiling And Load Requirements
Before you buy anything, figure out what your ceiling is made of. Most attached garages built to modern residential code use 2x6, 2x8, or 2x10 dimensional lumber joists spaced 16 or 24 inches on center. Trussed ceilings are common in newer construction, and those change the rules significantly. Truss bottom chords are typically 2x4 lumber engineered as tension members, not bending members, which means hanging concentrated loads from them can compromise the truss geometry. If your garage has a manufactured truss system, contact the truss manufacturer or a structural engineer before you drill anything.
Standard residential ceiling joists on 16-inch centers with a 2x6 minimum cross-section can typically carry an additional 40 pounds per square foot of dead load beyond the drywall, but that number depends on span, species, and grade. The International Residential Code sets minimum ceiling framing requirements in IRC Chapter 8, and consulting a local building inspector for anything over 400 pounds of concentrated load is smart practice. Racks that mount to two joists distribute load poorly. Racks that span four or six joists spread the weight and behave far better under real-world use.
Measure your ceiling height with the rack installed. Standard racks drop between 12 and 45 inches below the ceiling, and you need to clear the roof of your tallest vehicle plus the swing arc of the garage door. A typical sectional door needs 12 to 16 inches of clearance above the fully raised panel. Add a 2-inch safety margin. If you cannot clear a 24-inch drop over your F-150, do not force the geometry with a shorter rack. Instead, shift the rack toward the front or rear of the garage where door clearance is not a factor.
Choose The Right Rack And Hardware
Overhead racks fall into three general categories. Fixed steel racks like the SafeRacks 4x8 or the Fleximounts GR48H hold 400 to 600 pounds distributed and mount directly to ceiling joists. Motorized platform lifts like the Auxx-Lift 1400 raise and lower with a corded remote and cost three to four times more. Ceiling-mounted bike and kayak hoists handle single items with a pulley system. For general storage the fixed steel rack is the workhorse, and it is the type this guide targets.
Verify the rack's rated capacity is the distributed load rating, not the peak spot load. A rack rated at 600 pounds distributed cannot hold a 400-pound safe in one corner. Move heavy items to the center where multiple support arms share the weight. Read the manufacturer's installation manual completely before you start. Fleximounts, for instance, specifies 3/8-inch lag bolts of a minimum length equal to the joist depth minus a half inch, meaning a 2x8 joist requires 3/8 by 7-inch lag bolts with fender washers.
Do not substitute drywall anchors, toggle bolts, or shorter lag screws to save time or budget. Every documented rack failure I can find in incident reports traces back to fastener substitution or missed joists. Buy Grade 5 or better lag bolts, buy fender washers rated for the bolt diameter, and buy two extras of each in case one gets damaged during installation. Total hardware cost for a proper installation runs 30 to 50 dollars and it is not the place to economize.
Locate And Mark The Ceiling Joists
A quality stud finder is the difference between a rack that lasts twenty years and a rack that pulls out of drywall in the first month. The Franklin Sensors ProSensor 710 or the Bosch GMS 120 scan a wider zone than the older single-sensor models and reliably find joists through half-inch or five-eighths-inch drywall. Scan slowly, mark both edges of each joist, and confirm the joist runs perpendicular to the direction you are marking. If your stud finder gives inconsistent readings, drive a 3-inch finish nail through a marked spot to confirm wood is present, then patch the pinhole later with spackle.
Snap a chalk line between joist marks along the length you plan to mount. This gives you a straight reference for lag bolt placement. Overhead racks typically use L-shaped ceiling brackets that bolt into two adjacent joists per bracket, so you need four bolt locations per bracket and two brackets per rack minimum. Larger 4-by-8 racks use four brackets and eight bolt locations. Every location must hit the meat of a joist, not the edge.
Verify joist orientation. In most garages joists run parallel to the shorter dimension of the room, but in some framing layouts they run the other way. If your rack orientation forces bolts to land between joists, you cannot install the rack in that direction. Rotate the rack ninety degrees or move it. Never bolt a heavy rack into drywall alone, and never assume a single lag bolt hitting a joist is enough. Manufacturers specify multiple bolts per bracket for a reason. The load must be shared across enough fasteners that no single bolt sees more than its rated shear capacity.
Mount The Support Brackets Correctly
Predrill every lag bolt hole. A 3/8-inch lag bolt needs a 1/4-inch pilot hole in softwood framing, or 5/16-inch in denser lumber like Douglas fir. Drilling without a pilot hole splits the joist along the grain, and a split joist loses roughly half its withdrawal resistance. Use a stop collar or wrap tape around the drill bit to prevent overdrilling into whatever is above the joist, which might be an attic space, insulation, or roofing membrane.
Set the ceiling bracket in position, thread the lag bolts through the bracket holes with a fender washer under each head, and tighten with a socket wrench or an impact driver on a low torque setting. Aim for firm resistance without splitting the wood. If you are using an impact driver, set the clutch to medium and finish the last quarter turn by hand. Overtightening crushes the wood fibers under the washer and reduces holding power. The washer should compress the wood slightly, not disappear into it.
Check each bracket for level after installation. Ceiling joists are rarely perfectly flat, and shims may be required to keep the rack level once both brackets are in place. Composite shims work better than wood shims because they do not compress over time. With brackets mounted, install the vertical support arms per the manufacturer's diagram, torque the bolted connections to the specified value, and confirm every fastener is snug before you attach the storage deck. Skipping the torque check at this stage is the single most common installation shortcut, and it also is the single most common failure point.
Load The Rack And Test The System
Start with a controlled load test before you fill the rack with real gear. Place 25 percent of the rated capacity across the deck in a distributed pattern and leave it for a week. Walk under the rack daily and look for any sagging brackets, popped drywall around the bolt heads, or new gaps between the bracket and the ceiling. Small movements at this stage tell you something is wrong before a full load makes it dangerous. If the rack settles more than an eighth of an inch during the test, remove the load and reinspect every fastener.
OSHA references residential storage weight distribution guidance through its general industry storage and handling standards, and the principle of distributing heavy items low and light items high applies just as strongly overhead as it does on shelving. Center your heaviest bins over the support brackets, not between them. Long items like fishing rods or lumber should lie flat across the deck, not hang over the edges where a single bump could rotate them off the rack.
Once the test week passes without issues, load the rack normally but stay under 80 percent of the rated capacity for daily use. That safety margin absorbs the dynamic loads that come from tossing a bin up, from vibration when the garage door slams, and from the slow creep that happens as wood joists dry and lose a small amount of clamping force on lag bolts over the first year. Reinspect every fastener after the first six months and annually thereafter. A five-minute inspection with a socket wrench catches problems before they become emergencies.
Wrapping Up Your Project
An overhead garage rack installed properly is one of the highest-value weekend projects in home organization. You reclaim floor space, protect stored items from moisture and pests, and add usable capacity without expanding the footprint of the garage. The whole job takes four to six hours for a first-timer, uses about 50 dollars in hardware beyond the rack itself, and pays back the first time you can actually park inside during a winter storm.
The safety story is simpler than it looks. Verify your ceiling framing before you buy. Choose a rack sized to your real storage needs, not the biggest one in the aisle. Locate joists with a modern multi-sensor stud finder and confirm them with a nail. Predrill every lag bolt hole, torque every fastener to spec, and load the rack in stages while you watch for movement. Skip any of those and you invite failure. Follow them all and the rack outlasts the vehicle parked beneath it.
One last piece of advice: label your bins on the underside as well as the side. Once the rack is in place and loaded, you will spend more time looking up at bin bottoms than at bin sides. Clear photos of the contents attached to the underside of each container save real time when you actually need something. Reinspect fasteners on the same schedule you check smoke alarm batteries, and this project will quietly do its job for decades. Now go get that floor back.
More Articles You May Like



Comments
Post a Comment