
Concrete To Wood Floor Level Difference Ramp Molding
Concrete To Wood Floor Level Difference Ramp Molding
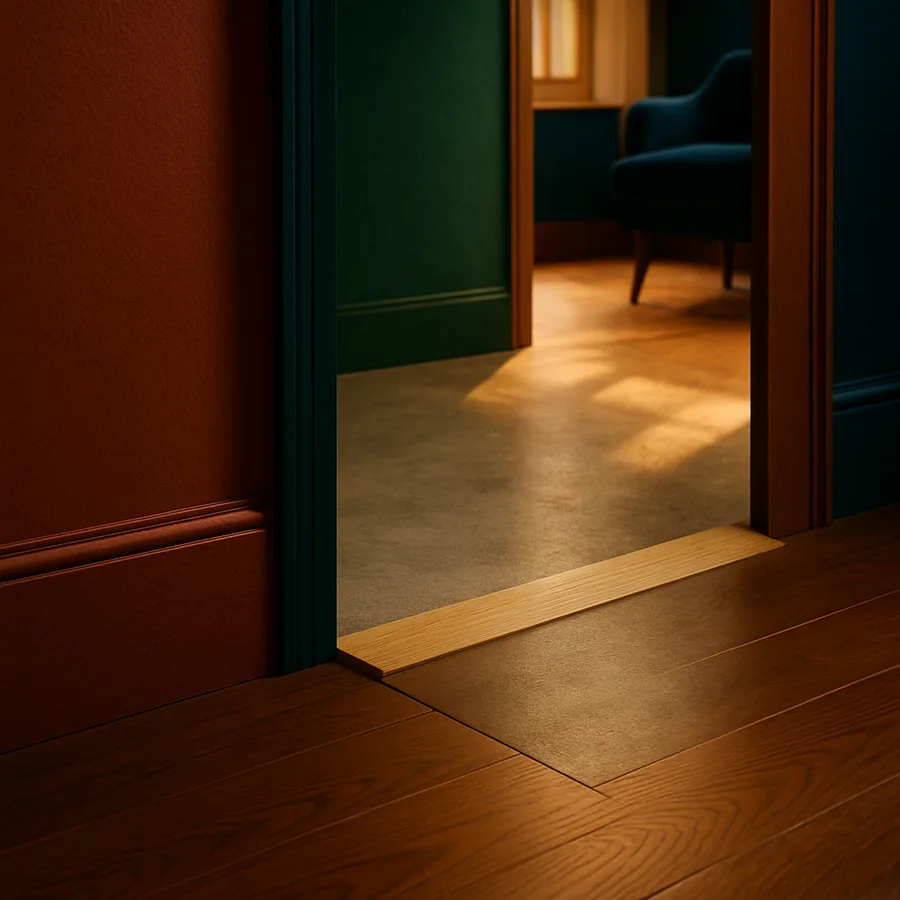
The IRC and ADA guidelines converge on a critical number for floor-height transitions inside a dwelling: any change in elevation greater than 1/4 inch and up to 1/2 inch must be beveled at a slope no steeper than 1:2, and any change greater than 1/2 inch must be treated as a ramp with a maximum 1:12 slope over any traversable path. A polished concrete slab in a converted warehouse loft that sits 3/4 inch below the finished wood floor of an adjacent addition - not an unusual condition in urban renovation - falls squarely inside the ramp category, not the beveled-threshold category. Homeowners routinely underestimate this threshold as a simple molding decision. It is, in fact, a code question with a molding as its final expression.
This piece works through the concrete-to-wood transition where the two floors are more than 1/2 inch apart in elevation, and where a ramp molding - sometimes called a sloped reducer or an accessibility reducer - is the correct tool. We will begin with the codes and geometry that dictate the ramp slope, then look at the substrate preparation that determines whether the ramp holds up over years of foot traffic, then examine the material choice that determines both appearance and durability, and end with the signals that identify a properly executed job.
The Slope That The Code Actually Requires
The first mistake with a concrete-to-wood transition of more than 1/2 inch is to reach for a standard reducer molding and hope that the visual result looks acceptable. A standard reducer designed for a hardwood-to-tile joint tapers across roughly 1-1/2 to 2 inches, producing a slope somewhere between 1:8 and 1:16 depending on the actual height differential. For a 3/8 inch drop, this slope is fine. For a 3/4 inch drop, that same 2 inch reducer produces a 1:2.7 slope - too steep for accessibility, too abrupt to walk across without noticing, and a hazard for anyone with mobility limitations or anyone carrying an object with two hands.
The relevant code language for interior transitions comes from a few sources. The residential building code addresses threshold heights at exterior doors specifically, but for interior transitions the general expectation is that a differential of more than 1/4 inch must be beveled and more than 1/2 inch must be ramped. Where accessibility is a design goal - aging in place, universal design, or a household with any wheelchair or walker use - the 1:12 maximum slope of ADA-derived guidance applies.
A 1:12 slope means that for every 1 inch of vertical rise, you need 12 inches of horizontal run. A 3/4 inch elevation change therefore requires a 9 inch ramp. That is a substantial molding - much wider than any standard reducer sold at a home center. In practice, ramp moldings for interior floor transitions are usually fabricated as custom pieces or specified from architectural millwork suppliers who produce them to length. They are typically 6 to 10 inches wide, made of hardwood matched to the field flooring, and profiled with a gentle radius at the top and bottom edges rather than a hard corner.
The U.S. Access Board maintains the technical guidelines that inform ADA compliance, and their guidance on changes in level is worth reading before finalizing any transition between floors that differ by more than 1/2 inch. Even in a private residence where ADA is not mandatory, the same slope principles apply as a matter of livability. A slope steeper than 1:12 is fatiguing to traverse repeatedly; a slope shallower than 1:20 is essentially unnoticed.
There is also a visual question in how the ramp molding sits at the joint. The top of the ramp should meet the wood floor exactly flush - a 1/16 inch step at the top is enough to catch a heel. The bottom of the ramp should meet the concrete with either a flush condition, if the concrete is finished flat, or a small metal termination bar if the concrete has an epoxy coating or a sealer that would peel at a hard edge. The junction at the top is where the wood-to-wood color match matters; at the bottom, where the wood-to-concrete color contrast is unavoidable, the design should acknowledge and clean up that line rather than pretend it does not exist.
One further geometric detail: the ramp molding is not typically flat across its width. A properly profiled ramp is slightly crowned in the middle, by perhaps 1/32 inch, to shed any liquid toward the edges rather than allowing it to pool along the center line. This detail matters most in kitchens and utility rooms and is worth requesting from a fabricator when the ramp is custom made.
The Substrate Preparation That Holds The Ramp In Place
The concrete side of a concrete-to-wood ramp is the challenging substrate. Concrete slabs in the vertical transition zone are rarely perfectly flat, are rarely dry to a level that a wood-based adhesive is comfortable with, and are rarely dust-free enough to bond well to anything without preparation. Skipping the substrate work is the reason so many concrete-side transitions eventually pop loose.
The first preparation step is a moisture assessment. A concrete slab that reads more than 4 lbs per 1000 sq ft per 24 hours on a calcium chloride test, or above 80 percent relative humidity on an in-situ probe, is too wet to bond a wood ramp molding to without a moisture-mitigating primer. Even in a dry slab, the surface should be prepared with a shot-blasted or ground profile to CSP 3 or CSP 4 texture to ensure mechanical adhesion. A trowel-smooth slab surface, however clean, gives an adhesive nothing to grip.
The second step is flatness. A slab that is flat within 1/8 inch over 10 feet is workable for a ramp molding install. A slab with a deeper dish, or with local high points from tie-off marks, needs to be brought to plane with a self-leveling underlayment along the transition zone. This underlayment should be feathered to zero at least 6 inches back from the ramp face on the concrete side, so that the ramp molding sits on a plane rather than bridging a dip.
The wood side has its own preparation demands. If the wood floor is a nail-down over plywood subfloor, the last board should be fastened tightly and the edge should be either straight-cut or eased with a fine block plane to make a clean line for the ramp molding to meet. If the wood floor is a floating engineered assembly, the last board must be allowed to move freely - the ramp molding cannot pin the field, or the floor will develop peaks and gaps somewhere else along its span within a season.
The concrete-side attachment method depends on the specific ramp molding. Three common approaches are used in residential work: adhesive-only, adhesive plus concrete anchors, and a metal termination bar plus adhesive. Adhesive-only is appropriate when the ramp molding is short - 4 feet or less - and the slab is well prepared. A high-performance construction adhesive suitable for wood-to-concrete bonding, applied as a full-coverage bead, will hold a properly seated ramp indefinitely. Adhesive plus anchors adds concrete screws through the ramp foot into the slab, spaced 12 to 18 inches on center, with the screw heads countersunk and filled. This is the preferred method for ramps longer than 4 feet or in high-traffic zones.
The metal termination bar option is used when the concrete has a finished coating - sealer, epoxy or polished - that must not be disturbed. The termination bar is a thin metal profile fastened to the concrete along the ramp footprint, providing a mechanical edge that the ramp can rest against without adhesive contact with the finished coating. This preserves the concrete finish and provides a clean visual break between the wood ramp and the concrete field.
The International Residential Code, section R311, addresses floor level changes at doorways with the general provision that changes exceeding 1/2 inch must be treated by a ramp not exceeding 1:12 slope, or by handrails where the change constitutes a step, for interior residential circulation paths.
The Material That Both Wears Well And Reads Correctly
A ramp molding is a wear surface. It gets more foot traffic per square inch than any other piece of trim in the room, because every person crossing between the two floors puts their whole weight onto a piece of wood that is at most 10 inches wide. The material choice therefore has to satisfy two demands at once: it has to visually match the wood floor above it, and it has to physically survive years of traffic without dishing out in the middle.
The default choice is a species match to the field flooring - red oak ramp for a red oak floor, white oak ramp for a white oak floor. This produces the cleanest visual line at the top of the ramp where the two woods meet. The trade-off is that softer species like red oak, when milled into a wide ramp profile, will dent and wear along the center path much faster than a harder species would.
An alternative is to use a harder species - hickory, hard maple, or a densified engineered product - for the ramp itself and to accept a visible color contrast at the joint. This is a design choice that either reads as a deliberate accent stripe or reads as a mistake, depending on execution. If the intent is to make the ramp visible, the color contrast should be strong and confident; the ramp becomes a design element. If the intent is to make the ramp disappear, the species must match.
The finish schedule for the ramp should match the field floor, but with one modification: the ramp face should receive an additional coat of the same finish, applied after the ramp is installed. This gives the ramp a slightly heavier film build that resists abrasion better than the field around it. The extra coat also equalizes any minor color shift that occurs during install, when the ramp face may have been touched with a solvent for cleanup.
Consider the material and finish options that experienced installers turn to:
- Solid white oak ramp with a hardwax-oil finish, buffed on-site to match a hardwax-oil floor.
- Solid hickory ramp with a waterborne polyurethane finish, chosen for its high hardness and neutral color that reads either way.
- Engineered wood ramp with a factory finish, matched to a factory-finished floor for color and sheen consistency.
- Densified acetylated wood ramp for wet-adjacent conditions where a bathroom or laundry room opens onto the ramp.
- Brass or bronze inlay strip at the top edge of the ramp, protecting the wood-to-wood joint from foot-scuffing over decades.
Each option has a place, and the correct choice depends on the level of traffic, the aesthetic of the room, and the willingness of the homeowner to maintain the ramp on a slightly different schedule than the field floor. A ramp will generally need refinishing on the top face every 5 to 8 years, roughly twice as often as the field floor around it. This is not a defect; it is simply the reality of a wear surface that carries a disproportionate load.
The National Wood Flooring Association publishes technical guidance on wood-species selection for various applications, and their hardness ratings are the reference point for making a ramp material choice. Any species below about 1200 on the Janka hardness scale will show wear at the ramp face within 3 to 5 years of household traffic, and any species above about 1500 will hold up indefinitely with normal maintenance.
Signals You Got It Right
A concrete-to-wood ramp done correctly gives off a specific set of signals, most of them tactile rather than visual. Walk across it from the wood side toward the concrete side. Your foot should register the descent as a gentle transition, not as a step. If your foot senses a discrete drop, the top-of-ramp junction is not flush and needs adjustment. If the descent feels abrupt, the slope is too steep and the ramp is under-length for its rise. Neither is a failure that a fresh install will show - both develop only when the geometry was wrong from the start.
Push a rolling cart or a wheeled office chair up the ramp. It should climb without a lurch and without the wheels catching at the bottom edge. A cart that lurches at the top or catches at the bottom is telling you that the slope is not consistent from end to end. This can happen if the ramp was seated on an uneven substrate, and it is the earliest warning sign that the ramp will begin to loosen over the coming year.
Kneel and look along the length of the ramp with your eye at the concrete floor level. The bottom edge should read as a single straight line where wood meets concrete. Any wobble in the line means the concrete-side preparation was incomplete, and the ramp is bridging low spots rather than resting on a plane. Wobble at the top edge, where the ramp meets the wood floor, is a more serious sign that the two floors are moving relative to each other in ways the ramp cannot accommodate.
Look at the ends of the ramp. Where the ramp terminates into a wall, a door casing, or an adjacent piece of trim, the cut should be clean and the joint should be tight enough that a business card will not slip into it. A gap at the end is a dirt trap and a moisture path. It also reads as unfinished from a normal standing viewpoint. A tight end cut, mitered where needed and butted where possible, is one of the clear tells of a careful installer.
Run a moist rag along the length of the ramp, then dry it immediately. A well-finished ramp will shed the water without any darkening of the wood. A dark stripe that appears along the wood grain means the finish is thin in that area - usually the center path where wear has begun. This is the earliest indicator that the ramp is due for a refinish, and it appears years before the wood surface itself is visibly worn.
Finally, watch the ramp across a full year in the space. In summer humidity, the wood ramp will try to expand; in winter dryness, it will try to shrink. A properly seated ramp accommodates these movements through the joint design without lifting, cracking or separating from the concrete. If, twelve months in, the ramp is still tight to the slab, still level across its width, still color-matched to the field floor, and still silent under foot, every decision that led to this installation was correct - and a code-compliant, comfortable, durable transition has been made between two floors that were never meant to sit at the same elevation.


Comments
Post a Comment