
Wood Furniture Veneer Repair Lifting Edges And Bubbles
Wood Furniture Veneer Repair Lifting Edges And Bubbles
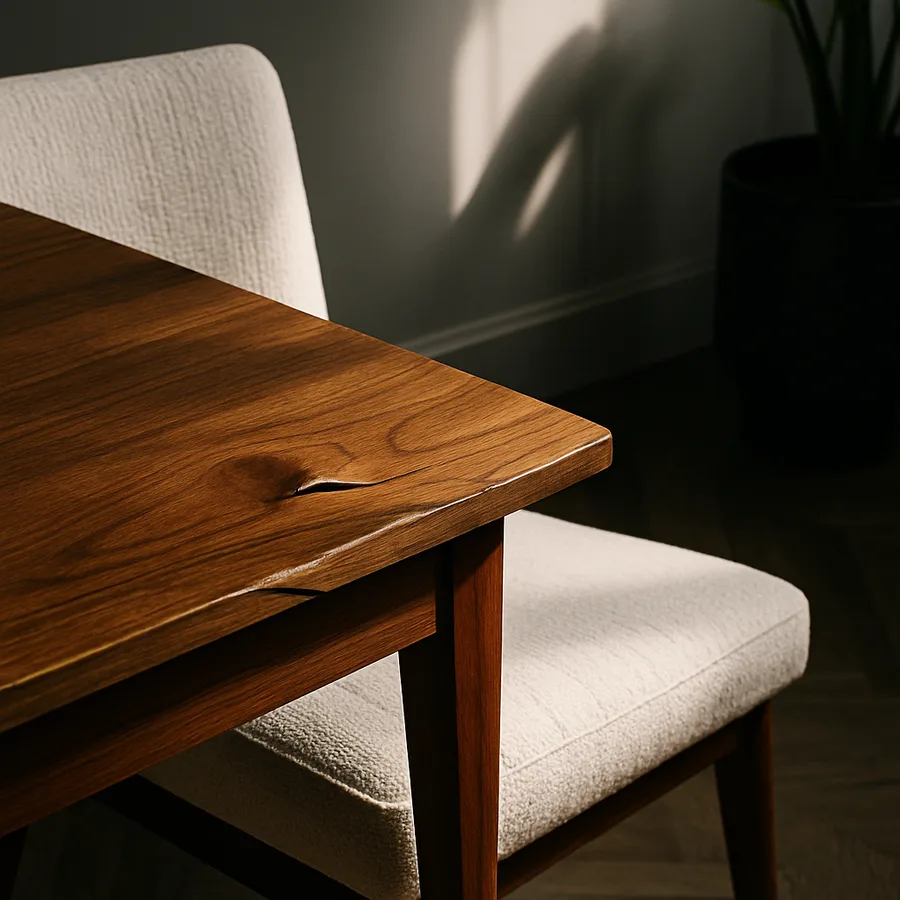
A piece of veneered furniture that develops a lifting edge or a soft bubble in the surface presents one of the more common and most fixable problems in home furniture care. Yet it is also one of the problems most frequently made worse by well-meaning intervention. The thin layer of decorative wood that gives a sideboard its figured walnut face or a chest its rosewood crossbanding is only between 0.5 and 2 millimeters thick on antique pieces and as thin as 0.25 millimeters on modern factory work. The Furniture Society estimates that veneer accounts for the visible surface of more than 70 percent of medium and high quality furniture sold in North America, which means that learning to repair lifting edges and bubbles is a skill that pays for itself many times over.
What causes veneer to lift in the first place? When is a bubble a sign of something serious underneath? Why do so many repair attempts fail within a year? This guide explains the underlying physics of veneered construction, then walks through the methods that actually hold up, distinguishing what an attentive homeowner can do at the kitchen table from what should go to a professional.
Why Veneer Lifts In The First Place
Veneer is bonded to a substrate, usually a stable wood such as poplar, mahogany, or modern engineered panels, using a glue that historically was hide glue, then animal protein or casein, and in modern manufacture is most often a urea formaldehyde or PVA resin. The bond between veneer and substrate is the weakest part of the assembly, and three forces work continuously to break it: moisture cycling, thermal expansion, and mechanical stress.
Moisture is the primary culprit. Veneer absorbs and releases moisture from the air far more readily than the heavier substrate, and the dimensional changes that result generate shear stress at the glue line. Over decades, this stress fatigues the bond, particularly along the edges of panels and around inlays where the veneer can expand outward into open air. The American Hardwood Information Center publishes data showing that an oak veneer can change dimension by 0.25 percent with each ten percent change in relative humidity, which over a 30 inch panel translates to nearly a sixteenth of an inch of movement, enough to crack glue lines that no longer have the elasticity to flex.
Thermal cycling adds another layer of stress, particularly on pieces placed near sunny windows, radiators, or fireplaces. Hide glue softens at relatively low temperatures, around 140 degrees Fahrenheit, and modern PVA glues lose strength at similar temperatures. A piece of furniture that experiences daily temperature swings between cool morning and warm afternoon develops bond fatigue at a measurably faster rate than a piece kept at stable temperature. Mechanical stress from heavy objects, dragging, or the natural movement of drawers and doors completes the picture.
Diagnosing Lifting Edges Versus Bubbles
A lifting edge appears at the perimeter of a panel, around an inlay, or along the corner of a tabletop, where the veneer has separated from the substrate and either curls upward visibly or feels loose to gentle pressure. Edge lifts are common because the edge is where the veneer is most exposed to air, moisture, and mechanical impact. Most edge lifts involve a relatively small area and are well within the scope of home repair when caught early.
A bubble appears in the interior of a panel, away from the edges, as a raised area that gives slightly when pressed and may make a hollow sound when tapped with a fingernail. Bubbles indicate that the glue bond has failed in an interior region, often because moisture penetrated through a finish crack or because the original glue was inadequate for the conditions. Small bubbles, under about two inches across, can usually be repaired at home. Larger bubbles or clusters of bubbles often indicate broader substrate problems and may need professional attention.
Before attempting any repair, examine the surrounding area carefully. Lifting at the edge of a panel that also shows a stained outline suggests that water has penetrated the substrate, which may be swollen or partially rotted underneath. A bubble accompanied by a soft area in the substrate when pressed firmly may indicate that the underlying wood has lost integrity. In both cases, the visible problem is a symptom of a larger condition that needs assessment before cosmetic repair.
The Tools And Materials Worth Having
A serviceable veneer repair kit fits in a small box and costs under 50 dollars. The essential items are a veneer hammer or small dense roller, a thin palette knife for working glue under lifted areas, a syringe with a blunt needle for injecting glue into bubbles, several types of glue selected for the specific repair, cauls made from flat scraps of hardwood, parchment paper to prevent stuck cauls, and spring clamps or weight in the form of cast iron pans, dictionaries, or sand bags.
For glue selection, hide glue is the historically correct choice for any antique piece and remains the best option for several reasons: it is reversible with heat and moisture, it holds well under the stresses that affect veneered furniture, and any squeeze out cleans up easily with warm water. Hot hide glue from a glue pot is traditional; pre-prepared liquid hide glue from Old Brown Glue or Titebond Hide Glue is convenient and performs almost as well at room temperature.
For modern pieces or where reversibility is not a priority, PVA wood glue works well. Choose a regular yellow PVA such as Titebond Original rather than the waterproof exterior grades, which set too quickly and leave a plasticky line if any squeeze out is not removed promptly. This Old House has tested several veneer repair adhesives in their workshop and consistently recommends hide glue for antiques and yellow PVA for newer construction, noting that contact cement, while sometimes recommended online, creates a bond that is too rigid for the seasonal movement of veneered panels and tends to fail within a few years.
Repairing A Lifting Edge
Begin by gently flexing the lifted veneer to assess how much glue residue is on both surfaces and how clean a bond you can achieve. If the underside of the veneer shows old glue residue, soften it with a damp cloth applied for a few minutes and scrape carefully with the palette knife. Do the same on the substrate side. The goal is to expose fresh wood on both surfaces while removing as little material as possible from the veneer itself.
Once the surfaces are clean, work fresh glue under the lifted veneer using the palette knife, spreading a thin even layer across the entire separated area. Avoid using too much glue, which will squeeze out and require cleanup, and which will not improve the bond. Press the veneer down with the veneer hammer or roller, working from the inner edge of the lift outward to push out air and excess glue.
Wipe any squeeze out immediately with a damp cloth, then place parchment paper over the repair, set a flat caul on top, and apply moderate clamping pressure or weight. The American Institute for Conservation training materials specify that hide glue repairs should be clamped for a minimum of four hours before unclamping and ideally overnight, with full strength developing over 24 to 48 hours. PVA repairs need slightly less time but benefit equally from overnight clamping.
Repairing A Bubble
Bubble repair requires getting glue under the veneer without lifting the veneer further or cracking it. The standard method uses a sharp scalpel or razor blade to make a single small slit along the grain of the veneer, ideally following a natural figure line where the cut will be invisible after repair. Make the slit just long enough to allow glue insertion, usually no more than half the length of the bubble.
Load thinned glue into a syringe with a blunt needle and inject it through the slit, working the needle gently from side to side to distribute glue under the entire bubble area. Use the lightest pressure possible to avoid forcing glue through other weak areas of the bond. Once glue is distributed, press the bubble down with a finger and watch for excess glue emerging from the slit. Wipe immediately.
Cover with parchment paper and a hardwood caul, then clamp or weight for the same duration as an edge repair. When the clamps come off, examine the slit carefully. A well executed slit along the grain often becomes nearly invisible once the surrounding veneer is back in plane. If the slit shows, it can be filled with a tiny amount of colored wax stick or shellac stick matched to the surrounding wood, applied with the tip of a knife and gently leveled with the surface.
When To Stop And Call A Professional
Several signs indicate that a repair is beyond the scope of home work. Veneer that is so thin it has worn through to the substrate cannot be reglued because there is nothing left to glue. Veneer that has shrunk so that pieces no longer meet at the seams may need patching with replacement veneer cut to match, which is delicate work that requires both matching stock and the ability to color the patch to blend invisibly. Substrate damage underneath the veneer needs to be addressed before any cosmetic repair will hold.
Pieces of significant value, family or financial, deserve a professional assessment before home repair. A skilled conservator can often save veneered furniture that looks beyond hope, and the value preserved usually justifies professional rates of 85 to 175 dollars per hour. Architectural Digest has profiled multiple restoration studios that charge in this range and consistently produce work that adds value to pieces well beyond the repair cost. The Smithsonian Institution furniture conservation department also publishes accessible technical bulletins on veneer treatment that homeowners can consult, and the Society of American Period Furniture Makers maintains directories of qualified conservators that homeowners can consult for referrals in their region.
Conclusion
Veneer repair rewards patience and punishes haste in equal measure. The methods are simple and have not changed substantially in two centuries, but each step depends on doing the previous step correctly. A lifting edge or bubble caught early and repaired carefully will hold for decades. The same problem ignored or repaired badly may compromise the piece permanently. The skills are worth learning because veneered furniture is everywhere, from estate sale finds to current production, and the difference between a piece that ages gracefully and one that progressively self-destructs often comes down to whether a homeowner addressed minor veneer problems before they grew.
The environmental conditions surrounding the piece matter as much as the repair technique. A veneered sideboard that has been repaired beautifully but returned to a room with wide humidity swings, direct sunlight on the top, and a hot air register blowing across the panels will develop new lifts and bubbles within a year or two. Stable indoor humidity in the 40 to 55 percent range, drapes or window film to reduce ultraviolet exposure, and HVAC vent deflectors that redirect airflow away from furniture all extend repair longevity substantially. Treating the environment is the long term complement to treating the symptoms.
If you have a piece with lifting veneer in your home right now, set aside an evening this week to assess it carefully and either complete the repair or schedule a professional evaluation. Procrastination is the most expensive choice in furniture care, and the small bubble that seems harmless today becomes the cracked and missing veneer that requires patching in a year or two. Treat veneer problems with the same urgency you would treat a small roof leak, and your furniture will reward you with decades of additional service.


Comments
Post a Comment