Fireplace Wall Stone Veneer Application Step By Step DIY
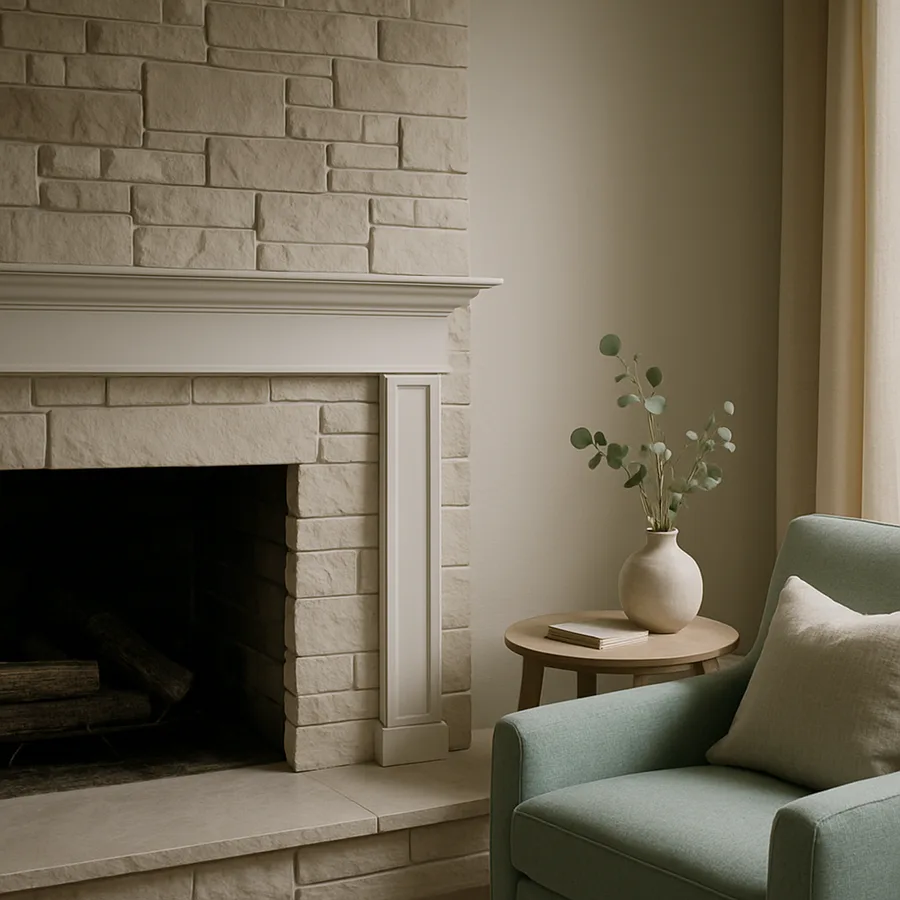
A stone veneer fireplace surround can transform an undistinguished wall into the architectural heart of a room in a single weekend of focused work, and the cost is a fraction of full natural stone. Manufactured stone veneer, often called adhered masonry veneer, has become one of the most popular DIY upgrades of the past decade, with the National Association of Home Builders reporting that more than 1.8 million square feet of veneer is installed in residential interiors each year. The American Society of Interior Designers has noted that stone surrounds rank among the top five requested fireplace finishes, ahead of plaster, tile, and painted brick, and the trend is being driven by the increased availability of high quality veneer products at home centers and tile showrooms.
Can a homeowner actually do this work without specialty tools or prior masonry experience? In most cases yes, provided the wall is properly prepared, the right adhesive and mortar are selected, and the layout is planned before any stone is permanently set. This guide walks through the full sequence with the kind of operational detail that lets a confident DIY weekend warrior succeed on the first attempt rather than learning through expensive mistakes.
Choosing Between Natural And Manufactured Veneer
The first decision is product type. Natural stone veneer is real stone cut to a thickness of three quarters to one and a half inches, then sold as flats and corners. It carries the depth and color variation of geological material and ages beautifully. The downsides are weight, cost, and cutting difficulty. Expect to pay 9 to 22 dollars per square foot for material plus the rental of a wet saw with a diamond blade.
Manufactured stone veneer is concrete cast in molds taken from natural stone, then colored with iron oxide pigments. It weighs roughly half what natural stone does, costs 4 to 12 dollars per square foot, and cuts cleanly with an angle grinder or even heavy snips for some products. The quality has improved enormously in the past decade, and for an interior fireplace surround the visual difference is minimal once the wall is grouted and lit.
Either product is suitable for a DIY installation, but the calculations change. A typical fireplace surround of 60 to 100 square feet of natural stone may weigh 700 to 1,500 pounds, which exceeds what unreinforced drywall can support. Manufactured veneer in the same area weighs 350 to 750 pounds and is generally within drywall capacity provided the proper scratch coat and reinforcement are used.
Preparing The Wall And Substrate
Substrate preparation is the single largest source of failure in DIY veneer installations. The wall must be flat, structurally sound, and finished with a surface the adhesive system can bond to mechanically. For interior installations on drywall, the standard preparation is to fasten metal lath directly to the studs using one and a quarter inch corrosion resistant screws on six inch centers, then apply a scratch coat of Type S mortar troweled smooth and scored with a notched trowel.
The scratch coat should cure for at least 24 to 48 hours before stone setting begins. Skipping this cure time is the most common mistake among first time installers, and the result is veneer that adheres temporarily, then drops in sheets months later. Patience here pays direct safety and durability dividends.
If the existing wall is brick, masonry, or properly prepared cement board, the metal lath and scratch coat can sometimes be omitted, but verify with the specific veneer manufacturer. Each product has its own approved substrate list, and warranties are void if installation departs from those specifications. The Hearth, Patio and Barbecue Association provides general guidance on clearances to combustibles, but always defer to local code and the appliance manufacturer for the specific firebox.
Layout And Dry Fit
Before any mortar mixes, dry fit at least the first three rows on the floor in front of the wall. Spread the boxes of stone across the work area and select pieces with a deliberate eye for balanced color, varied size, and minimal repetition of distinctive shapes. The visual quality of the final wall is largely set during this selection step, and rushing it produces obvious patterns that read as artificial.
Plan the corners first. Corner pieces are pre-formed L shapes that wrap an outside corner with the long leg alternating direction on each course, mimicking the bonding pattern of real stone masonry. The corners establish the vertical rhythm of the wall, so lay them out floor to ceiling before filling in the flat field.
Mark a level reference line on the wall using a laser or chalk line. The first course is the foundation of everything that follows, so it must be dead level even if the floor is not. Plan for a slight gap at the bottom that will be hidden by hearth stone or trim, and check the verticality of the corners with a four foot level frequently as the installation rises.
Mortar Mixing And Stone Setting
Mix mortar in small batches that you can use within 30 to 45 minutes before it begins to set. Use a Type S polymer modified mortar designed for adhered veneer, mixed to the consistency of stiff peanut butter. If the mortar is too wet, it slumps off the stone; if too dry, it does not bond. The right consistency holds a clean ridge when pulled through with a trowel.
Butter the back of each stone with a layer of mortar at least half an inch thick, then press it firmly to the wall with a slight twisting motion that ensures full contact. A small amount of mortar should squeeze out around the perimeter, confirming complete coverage. Voids behind veneer collect moisture and cause freeze damage on exterior applications and bond failures everywhere.
Work from the bottom up if using a wet joint pattern with grout between stones, or from the top down if using a dry stack pattern with stones touching. Either approach is legitimate, but the choice affects how mortar drips are managed. Top down installation keeps fresh stone clean by allowing drips to land on uninstalled surfaces; bottom up requires careful sponging as the work proceeds.
Grouting Pointing And Cleanup
If your installation uses a wet joint, allow the stone to set for 24 hours before grouting. Mix mortar grout to a thicker consistency than the setting mortar and force it into the joints using a grout bag, the masonry equivalent of a pastry bag. Fill joints completely without smearing the stone faces, then allow the grout to firm up for 30 to 60 minutes.
Once the grout has reached a thumbprint consistency, tool the joints with a striking iron or a piece of bent copper tubing to compress and shape them. Brush the joints with a stiff masonry brush to remove crumbs and clean the stone faces. Better Homes and Gardens recommends a final wipe with a slightly damp sponge to remove residual haze without disturbing the green mortar.
For dry stack installations, the joints between stones should be tight enough that no mortar grout is visible. This look is more contemporary and demands more careful stone selection, since gaps cannot be hidden by grout. Some installers add a small amount of dark mortar in the recesses behind the stones to create shadow lines that visually unify the wall.
Sealing Maintenance And Common Pitfalls
Should you seal the finished wall? It depends on the product and the location. Most manufactured veneers come pre-sealed and require no additional treatment. Natural stone, particularly limestone and sandstone, benefits from a penetrating sealer applied after the mortar has fully cured for 28 days. The sealer reduces dust and makes occasional cleaning easier without changing the appearance significantly.
Maintenance is minimal for interior installations. Vacuum the surface monthly with a soft brush attachment to remove dust, and address any soot from the fireplace with a dry masonry brush before it sets. Avoid wet cleaning except for occasional damp wiping with plain water, since soaps can leave residues that highlight rather than clean the stone.
The most common DIY pitfalls are insufficient substrate preparation, inconsistent mortar consistency, careless corner alignment, and impatience during cure times. Have you allowed enough time in your project plan for the substrate to dry and the mortar to set between phases? A rushed weekend installation that compresses a five day sequence into 36 hours rarely produces good results. Plan for at least one full week between starting demolition and admiring the finished wall.
Conclusion
A stone veneer fireplace surround is one of the highest impact DIY projects available to a confident homeowner, delivering a fully transformed room from a long weekend of work and a few hundred dollars of materials. The technical skills required are achievable, the tools are mostly rentable, and the results, when executed with care, are essentially indistinguishable from professionally installed work at a fraction of the cost. The investment of time pays off every single evening that the room is enjoyed.
Success comes down to respect for the substrate, patience with cure times, deliberate layout, and disciplined mortar work. Of those four, the substrate preparation is the one most often shortchanged by DIY installers, and it is the one whose failure produces the most catastrophic results. A wall that drops in sheets months after installation cannot be repaired without complete removal, so the time spent on lath, scratch coat, and curing is the most important time in the entire project.
Take the time to choose a stone product whose color and texture genuinely please you when viewed in your own light. Photographs in showrooms and on websites cannot capture the subtle interplay of color and shadow that distinguishes a successful surround from a mediocre one. Bring samples home, lean them against the existing wall, and live with them through several days and evenings before committing to a final purchase.
Ready to begin? Sketch your wall, calculate the square footage including a 10 percent waste factor, gather references that match your aspirations, and visit a local stone supplier with your homework done. Ask about contractor pricing if you are purchasing the full quantity, and request a sample board to take home. With careful planning and patient execution, your finished fireplace will anchor your room for as long as you live in the house.
Tools And Materials Checklist
A successful stone veneer installation depends on having the right tools and materials staged before work begins. The cutting tools include an angle grinder with a continuous rim diamond blade, a sturdy mason's hammer for trimming irregular edges, and a wide chisel for splitting larger stones. Eye protection, hearing protection, and a high quality respirator are non negotiable, since dry cutting of veneer produces silica dust that is genuinely hazardous to lungs over time and produces effects that may not be apparent for years.
For mortar work, gather a wheelbarrow or large mortar tub, a mortar mixing paddle that fits a half inch drill, multiple buckets for water and clean tools, and several margin trowels in different sizes. A pointing trowel for tooling joints, a grout bag for filling them, and a stiff masonry brush for cleanup round out the kit. Most of these tools can be rented from any well stocked home center for less than the cost of buying them outright, and the rental fees rarely add more than fifty dollars to the total project cost.
Material quantities should include the calculated square footage of flats plus the linear footage of corner pieces plus a ten percent waste factor. Buy all the stone in a single delivery if possible, since color batches vary between production runs and a mid project resupply may produce a visible color shift. Order extra mortar bags and grout color packs to avoid running short on a Sunday afternoon when the supply house is closed and your work has to stop mid wall.
Working Around The Existing Firebox
Most DIY stone veneer projects work around an existing firebox rather than installing alongside a new one, and the existing surround introduces several technical challenges. The firebox opening must be detailed cleanly with a finished edge of some kind, typically a steel angle iron set as a lintel above the opening and tile or stone returns that wrap into the firebox itself. Plan these details before any stone is set so the edges land where they should rather than being improvised in the moment.
Combustible clearances are mandatory and non-negotiable. Wood burning appliances generally require at least six inches of non-combustible material above the firebox before any mantel or combustible trim can be installed, and the specific dimension depends on local code and the manufacturer of the appliance. Verify the clearance with your municipal inspector before any veneer goes up, since corrections after the fact require removing and reinstalling stone at significant cost and can also delay your project for weeks.
If the existing surround is brick, you can often install veneer directly over the brick after applying a bonding agent. If it is wood paneling or painted drywall, the surface must be removed and the substrate built up properly with cement board or metal lath before veneer can be applied. Cutting corners here is the single most common cause of failed installations, so resist the temptation to skip steps even when the temptation is strong and the deadline is pressing.
More Articles You May Like



Comments
Post a Comment