Wood Plank Ceilings in Bathrooms for Cottage Style Warmth
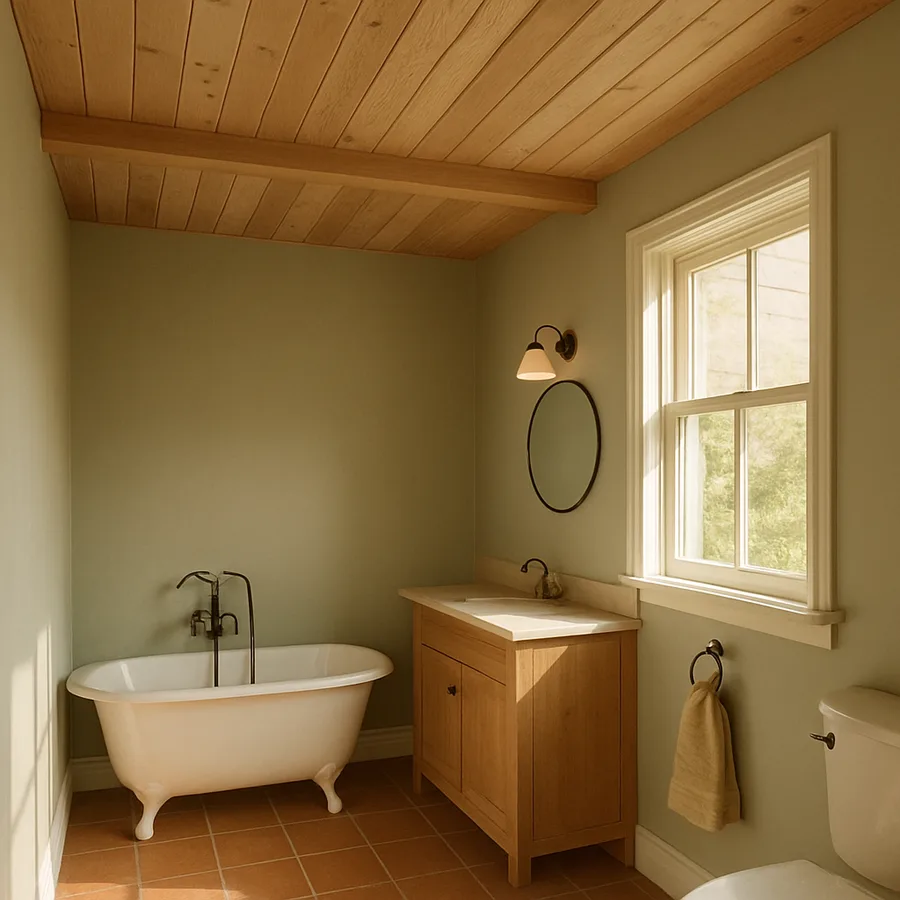
A flat painted drywall ceiling in a bathroom does its job, but it adds nothing to the room's character. Replace that drywall with tongue-and-groove wood planks and the entire space transforms. The room feels warmer, more textured, and decidedly more cottage-like. Light bounces differently. Steam looks more atmospheric. The acoustic quality of the room changes from clinical to gentle. For homeowners who love cottage style or simply want their bathroom to feel less like a hospital and more like a retreat, wood plank ceilings are one of the most impactful changes possible.
The challenge is that bathrooms are wet, humid, and prone to mold growth. Wood and water have a complicated relationship, and a ceiling installation that fails over time turns into a major repair project. This guide covers everything you need to know to specify, install, and maintain a wood plank ceiling that will survive decades of showers, baths, and the daily humidity cycle of a heavily used bathroom. Done right, a wood ceiling can outlast the rest of the bathroom finishes by 20 years or more.
Why Wood Works in Bathrooms (When Done Right)
The conventional wisdom that you cannot use wood in bathrooms is outdated. Properly sealed and ventilated wood has been used in bathing spaces for centuries. Japanese ofuro tubs are traditionally lined with hinoki cypress. Scandinavian saunas are entirely wood-clad. Cottage bathrooms throughout the British Isles have featured wood ceilings since the Victorian era. The common thread in all these examples is correct species selection, appropriate finishing, and adequate ventilation.
According to a 2023 industry report from the National Association of Home Builders, wood ceiling installations in bathrooms have increased approximately 31 percent over the past five years, driven by the broader cottage and farmhouse aesthetic trends. The report attributes the resurgence to improved moisture-resistant wood treatments, better bathroom ventilation systems, and growing consumer interest in natural materials.
Wood also has functional benefits in bathrooms beyond its visual warmth. It absorbs and releases moisture more gradually than drywall, helping to buffer humidity spikes during showers. It does not promote mold growth as aggressively as paper-faced drywall when properly sealed. And it muffles sound, reducing the harsh acoustic reflections that make tile bathrooms feel cold and echoey. The combined sensory effect of a wood ceiling is a bathroom that feels softer in every dimension.
Choosing the Right Wood Species
Not all wood is suitable for bathroom ceilings. The ideal species combines natural rot resistance, dimensional stability, and cottage-appropriate aesthetic. Western red cedar is the most common choice. It has natural oils that resist moisture and decay, it weathers gracefully, and its warm reddish-brown color adds immediate cottage character. Cedar planks are widely available in tongue-and-groove profiles and accept stains and clear sealers beautifully.
White pine is another popular option, especially when you want a more rustic, knot-rich appearance. It is less naturally rot-resistant than cedar, so it requires more aggressive sealing, but it is also significantly less expensive and easier to source. For more upscale installations, cypress offers exceptional moisture resistance and a slightly lighter color palette than cedar. The wood was historically used in coastal homes throughout the southeastern United States precisely because of its tolerance for humid conditions.
Avoid hardwoods like oak, maple, and walnut for bathroom ceilings. These species are dense and beautiful but they expand and contract significantly with humidity changes, which can cause warping, cupping, or joint separation over time. Engineered wood products like beadboard panels with marine-grade plywood substrates can work well if you want a smoother, more refined look, but verify the substrate is rated for high-humidity use. The American Wood Council publishes detailed species guides through its educational programs that can help you compare moisture performance across dozens of options.
Moisture Management and Ventilation Requirements
The single most important factor in a successful bathroom wood ceiling is ventilation. The bathroom exhaust fan must be sized and operated correctly to remove humid air faster than the shower can produce it. Industry guidelines from the ASHRAE recommend a minimum exhaust capacity of 50 cubic feet per minute (CFM) for bathrooms up to 100 square feet, with an additional 1 CFM per square foot for larger bathrooms. For bathrooms with wood ceilings, designers typically recommend stepping up to 80 to 100 CFM regardless of room size to provide a safety margin.
The exhaust fan should run during showers and for at least 20 to 30 minutes afterward. Many modern fans include humidity sensors that automatically operate the fan when relative humidity exceeds a setpoint, which is the most reliable way to ensure consistent moisture management. Some installers recommend a dedicated humidity sensor for wood-ceiling bathrooms, set to trigger fan operation at 65 percent relative humidity.
Beyond ventilation, the wood itself must be sealed properly. Apply a high-quality, moisture-resistant clear sealer or low-VOC interior wood finish to all six sides of every plank before installation. This includes the tongue and groove edges, which are often skipped because they will be hidden once the boards are joined. Sealing all six sides creates a uniform moisture barrier that prevents differential expansion between exposed and hidden surfaces. Marine-grade spar varnish is one option for very wet bathrooms, though its amber tone may darken light wood species more than desired.
Installation Techniques and Substrate Preparation
Installing a wood plank ceiling in a bathroom requires careful substrate preparation. Most installers recommend leaving existing drywall in place as a base layer (after first checking for any existing moisture damage or mold) and then attaching the planks directly to the drywall using either construction adhesive plus finish nails or by screwing through the drywall into the ceiling joists. The drywall layer adds an extra moisture barrier and improves overall thermal and acoustic performance.
For new construction or full renovations where the drywall is being replaced, install moisture-resistant green-board or cement board as the substrate before attaching the wood planks. Run a continuous bead of mold-resistant caulk around the perimeter of the room before installing the first plank, sealing the gap between the substrate and the wall finish. This prevents moisture from migrating into the wall cavity behind the planks.
Plank orientation matters both visually and structurally. Running planks across the room (perpendicular to the longer wall) creates a wider visual feel and is often the easier installation when joists are properly oriented. Running them lengthwise creates a more elongated feel and can be especially effective in narrow bathrooms. Install planks with the tongue facing the direction you are working, blind-nailing through the tongue at a 45-degree angle so that nail heads are hidden by the next plank's groove. Have you sketched out your plank layout before purchasing materials?
Finish Choices: Stain, Whitewash, or Natural
The finish you apply to your wood ceiling dramatically affects the cottage character of the finished room. Whitewash finishes are the most quintessentially cottage choice. They preserve some of the wood grain visibility while lightening the overall tone, brightening the room and creating that softly weathered, beachy quality associated with classic cottage interiors. Whitewash can be applied as a thinned white paint, a true lime wash, or a manufactured pickling stain.
Natural clear-finished wood is the most traditional choice and showcases the wood's intrinsic character. For cedar, this means a rich reddish-brown that will gradually mellow toward a warmer amber over years of light exposure. For pine, expect honey-gold tones that will deepen significantly over time, eventually reaching a soft caramel hue. Apply at least three coats of clear waterborne polyurethane or acrylic sealer for adequate moisture protection. Look for products specifically labeled for high-humidity interior use.
Stained finishes offer the widest range of aesthetic possibilities. A gray weathered stain can give new wood the appearance of vintage barn wood. A dark walnut stain creates a more dramatic, lodge-like feel. A blue-gray stain leans into the coastal cottage palette. Test stains on scrap pieces of your actual wood species before committing, because different woods absorb stain very differently. Pine often blotches with darker stains unless pre-treated with a wood conditioner, while cedar accepts stains more uniformly. According to a 2024 design trends survey from the American Society of Interior Designers, whitewashed wood ceilings now appear in approximately 23 percent of cottage-style bathroom remodels, making them the single most-specified ceiling treatment in that aesthetic category.
Long-Term Maintenance and Common Problems
A properly installed and finished wood ceiling requires modest but consistent maintenance. Inspect the ceiling annually for signs of moisture damage: dark spots, swelling at plank joints, or any visible mildew. Clean the surface gently with a soft cloth and a diluted vinegar solution (one part white vinegar to four parts water) to remove any soap scum or mineral deposits without damaging the finish. Avoid harsh chemical cleaners that can degrade sealers over time.
Plan to refresh the protective finish every 5 to 7 years, depending on the intensity of bathroom use. A refresh typically means a light sand with fine-grit paper followed by one or two new coats of clear sealer. This routine maintenance is far less work than addressing failed wood after a decade of neglect, and it preserves the cottage character indefinitely. Small bathrooms used by single occupants may stretch refresh cycles to 10 years; family bathrooms used by multiple people daily may need attention every 4 to 5 years.
The most common long-term problems are joint separation (planks pulling apart slightly as wood expands and contracts) and minor surface staining from condensation drips. Joint separation can usually be addressed by applying a slightly tinted caulk in the gaps, color-matched to the wood. Surface stains can be sanded out and re-sealed if caught early. Major water damage from a leak above the bathroom (a failed second-floor toilet seal, for example) requires replacing affected planks, but tongue-and-groove construction makes spot repairs reasonably straightforward when the damage is localized.
Good airflow habits also extend the life of a wood ceiling considerably. Encourage household members to leave the bathroom door open after showers, run the exhaust fan for the full recommended duration, and wipe down particularly wet surfaces (such as the area directly above a steam shower) with a microfiber cloth occasionally. These small habits add up to dramatically longer service life and far fewer maintenance interventions over the decades that the ceiling is in place.
Lighting Considerations and Visual Effects
Lighting design becomes more nuanced when you have a wood plank ceiling because the ceiling is no longer a uniform reflective surface. Wood absorbs and scatters light differently than painted drywall, and the texture of the planks creates micro-shadows that can either enhance or muddy the lighting effect. Plan your fixtures with this in mind. Recessed cans should be specified with wide beam angles (45 degrees or more) to spread light across the textured surface rather than create harsh hot spots.
For cottage-style bathrooms, vintage-inspired pendant fixtures with clear or seeded glass globes work particularly well because they cast a warm, diffused light that flatters the wood tones. Avoid overly bright cool-temperature LEDs (4000K or higher color temperature) which can make warm wood tones look orange or sallow. Stick to 2700K to 3000K bulbs, ideally with high color rendering index (CRI) ratings of 90 or above. The CRI rating measures how accurately a light source renders colors compared to natural daylight, and high-CRI lighting brings out the subtle tonal variations in the wood grain.
Consider supplementing overhead lighting with sconces mounted on the walls just below the ceiling line. These uplighting fixtures wash light across the wood surface from below, dramatically emphasizing the texture and creating a cozy glow that defines cottage atmosphere. The combination of overhead task lighting plus accent uplighting on the ceiling creates layered illumination that feels intentional and professionally designed rather than purely functional.
Conclusion
A wood plank ceiling in a bathroom is one of the most distinctive cottage-style features you can add to your home, and it is achievable in nearly any bathroom regardless of size. The keys to success are choosing a moisture-tolerant wood species, sealing every surface of every plank before installation, ensuring adequate ventilation through a properly sized exhaust fan with humidity sensing, and committing to a modest annual maintenance routine. With these elements in place, a wood ceiling will outlast the rest of your bathroom finishes by years or even decades.
The aesthetic payoff is substantial. The room feels warmer the moment you walk in. Steam from a hot shower curls beautifully against the wood texture instead of pooling on a flat painted surface. Light filtering in from a window during the morning falls more softly across the textured ceiling than it would across drywall. Acoustically, the room becomes gentler and quieter. These sensory benefits compound over years of daily use into a bathroom that genuinely feels like a retreat rather than a utility space.
If you are planning a bathroom renovation that includes ceiling work, take the time to evaluate whether wood planking might be the right fit for your home's overall style. Are you committed to the additional ventilation requirements and the long-term maintenance? Order samples of cedar, pine, and cypress, and test finishes side-by-side under your bathroom's actual lighting. Visit cottage-style homes in your area or browse portfolio photos from local bathroom designers who have completed wood ceiling installations. Ready to bring real cottage warmth to your bathroom? Schedule a consultation with a finish carpenter this month and start sketching your project on paper today.
More Articles You May Like



Comments
Post a Comment