Skylight Installation Costs and Sizes for Different Roof Pitches
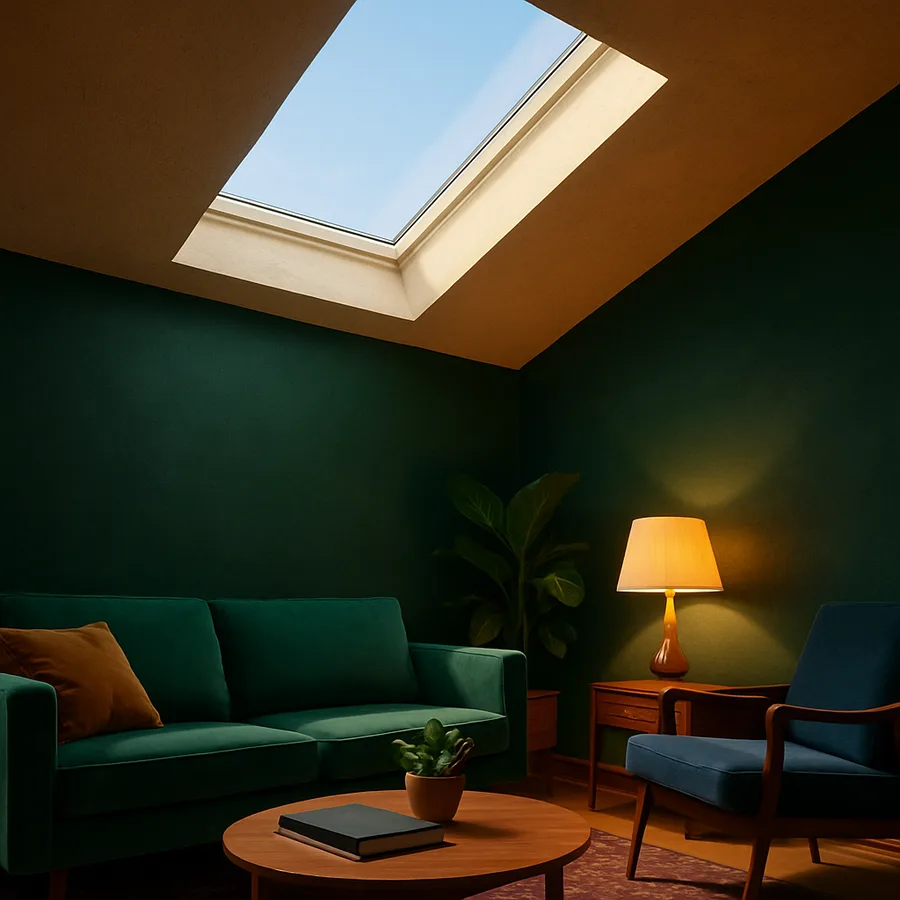
Natural light transforms the feel of every room it touches, and skylights remain one of the most effective ways to bring sunlight deep into a home where wall-mounted windows cannot reach. The U.S. Department of Energy reports that a properly installed skylight can deliver up to three times more light per square foot than a vertical window of the same size, making it a powerful tool for brightening interior spaces that would otherwise depend entirely on artificial lighting. However, the cost and complexity of a skylight installation vary dramatically depending on the pitch of your roof, the size of the unit, and the structural modifications required to accommodate it. A homeowner with a gently sloped 3:12 roof faces a fundamentally different project than someone working with a steep 12:12 pitch, and understanding those differences before requesting contractor bids prevents budget surprises and ensures the finished installation performs as intended. This guide breaks down the real costs, size considerations, and technical factors that roof pitch introduces into every skylight project.
How Roof Pitch Shapes the Entire Project
Roof pitch, expressed as the ratio of vertical rise to horizontal run, is the single most influential variable in skylight installation planning. A low-pitch roof of 3:12 to 4:12 presents minimal working difficulty for installers but demands careful flashing design to prevent water pooling around the skylight frame. A moderate pitch of 5:12 to 8:12 represents the sweet spot for skylight installations, offering natural water shedding without the safety challenges of steep surfaces. Pitches above 9:12 introduce harness requirements, specialized scaffolding, and significantly longer labor hours that push project costs higher. The National Roofing Contractors Association classifies any roof above 6:12 as requiring additional fall protection equipment, a regulation that directly affects the labor component of your installation estimate.
The pitch also determines which skylight products are appropriate for your roof. Fixed curb-mounted skylights, the most common and affordable type, work across virtually all pitches but require a raised curb frame whose height must be adjusted relative to the slope. On low-pitch roofs below 4:12, manufacturers typically require a taller curb to ensure adequate water clearance around the glazing perimeter. Deck-mounted skylights, which sit flush against the roof surface using an integrated flashing kit, are designed for pitches between 3:12 and 20:12 but perform optimally in the 5:12 to 12:12 range. Selecting the wrong mounting type for your pitch creates leak risks that no amount of sealant can permanently resolve, so matching the product specification to your roof geometry is a non-negotiable first step.
Beyond the mechanical considerations, roof pitch affects how much direct sunlight reaches the interior through the skylight at different times of day and year. A skylight on a steep south-facing roof in a northern climate captures intense winter sun at a low solar angle, providing passive heating benefits that can meaningfully reduce energy costs during cold months. The same skylight on a shallow-pitch roof would miss much of that low-angle light. The U.S. Department of Energy's Energy Saver program recommends orienting skylights to face within 15 degrees of true south and tilting them at an angle equal to your latitude plus 5 to 15 degrees for maximum year-round light capture. Understanding these relationships allows you to choose a skylight size and position that maximizes the return on your installation investment.
Homeowners frequently underestimate the connection between roof pitch and interior ceiling treatment. A skylight installed in a high-pitch roof section may require a light shaft or light well to channel illumination down to the room below, particularly when there is significant attic space between the roofline and the finished ceiling. Building a flared light well, which opens wider as it descends from the roof to the ceiling, can add $1,500 to $3,500 to the project depending on depth and finish. Conversely, cathedral ceilings that follow the roofline eliminate the need for a light well entirely, simplifying the installation and reducing the overall cost.
Real Cost Breakdowns by Pitch Category
The total installed cost of a skylight encompasses the unit itself, structural modifications to the roof framing, flashing and waterproofing, interior finishing, and labor. According to data from HomeAdvisor and Angi, the national average for a standard fixed skylight installation ranges from $1,500 to $3,500, but this figure assumes a moderate-pitch roof with straightforward framing. Low-pitch installations between 2:12 and 4:12 typically fall in the $1,800 to $3,800 range because they require specialized low-slope flashing systems and often a custom-height curb to maintain adequate water clearance. These additional waterproofing measures add roughly $300 to $800 to the material cost compared to a standard-pitch installation.
Moderate-pitch roofs in the 5:12 to 8:12 range deliver the most predictable pricing because they align with the standard specifications of most major skylight manufacturers. A 22-by-46-inch fixed skylight from Velux or Fakro costs between $400 and $700 for the unit alone, with a manufacturer-matched flashing kit adding another $80 to $150. Labor for a straightforward installation on a moderate pitch typically runs $800 to $1,500, bringing the total project cost to $1,500 to $2,500 for a fixed unit. Venting skylights, which open to allow airflow, command a premium of $200 to $500 over their fixed counterparts and require wiring for electric or solar-powered operation, adding another $200 to $400 for the electrical component.
Steep-pitch installations above 9:12 carry a labor premium that can increase the total project cost by 30 to 50 percent over a moderate-pitch equivalent. Roofing contractors working on steep pitches must use personal fall arrest systems, roof jacks, and sometimes scaffolding or lift equipment, all of which increase the crew size and extend the workday. A project that takes one crew four hours on a 6:12 roof may require six to eight hours on a 12:12 pitch with two additional safety workers. The material cost for the skylight and flashing remains similar, but the labor component can reach $2,000 to $3,500, pushing the total installed cost for a single steep-pitch skylight to $3,000 to $5,500. Homeowners with steep roofs should request at least three bids and verify that each contractor's estimate explicitly accounts for the pitch-related safety equipment and extended labor time.
Have you received a skylight estimate that seems unusually low compared to others? A bid that does not itemize flashing, curb construction, interior trim, and pitch-specific labor costs deserves scrutiny. The cheapest installation is almost never the most economical in the long run when the alternative is a leak that damages ceiling drywall, insulation, and flooring within the first few seasons. Investing in a properly engineered flashing system at the outset costs a fraction of the remediation bill that follows a failed economy installation.
Choosing the Right Skylight Size for Your Space
Skylight sizing involves balancing light delivery, structural impact, energy performance, and aesthetic proportion. The general industry guideline, endorsed by the Velux design team, recommends that skylight glazing area should equal approximately 5 percent of the floor area in rooms with few or no wall windows and 2 to 3 percent in rooms with existing window coverage. For a 200-square-foot bedroom with limited wall windows, this translates to roughly 10 square feet of skylight glazing, achievable with a single 30-by-48-inch unit or two smaller 22-by-30-inch units positioned for even light distribution.
Standard residential skylight sizes cluster around a few common dimensions that align with typical rafter spacing. The most popular fixed skylight is the 22.5-by-46.5-inch size, designed to fit between rafters set on 24-inch centers without requiring header construction. This dimension works on any pitch but delivers noticeably different amounts of light depending on the roof angle. On a low-pitch roof, the skylight aperture faces more directly upward, capturing a broader swath of sky and producing brighter, more diffuse illumination throughout the day. On a steep pitch, the same skylight acts more like a tilted window, admitting a narrower beam of more directional light that moves across the room as the sun tracks overhead.
Larger skylights measuring 30 by 54 inches or 44 by 46 inches require cutting through at least one roof rafter and installing structural headers to transfer the load around the opening. This framing modification is a significant structural intervention that must be designed by a licensed contractor or structural engineer, and it adds $500 to $1,200 to the installation cost beyond the skylight and labor charges. The payoff is a dramatic increase in light volume and visual impact. A single large skylight creates a stronger architectural statement than two smaller units and produces a more uniform wash of light with fewer shadow edges, though it also increases heat gain in summer and heat loss in winter compared to the equivalent area split between two smaller, better-distributed units.
For rooms where a traditional rectangular skylight would be either too large or awkwardly proportioned, tubular skylights offer a compelling alternative. These compact units, typically 10 to 14 inches in diameter, capture light through a small rooftop dome and channel it through a highly reflective tube to a ceiling-mounted diffuser. They cost between $500 and $1,000 installed and work on pitches from nearly flat to very steep without the structural modifications that larger skylights demand. While they cannot match the visual drama or light volume of a full-sized skylight, tubular units deliver surprising brightness to hallways, closets, and bathrooms where a traditional skylight would be impractical or disproportionate.
Flashing Systems and Waterproofing by Pitch
Flashing is the component that separates a skylight that performs for decades from one that leaks within its first year, and flashing requirements change meaningfully across the pitch spectrum. On low-pitch roofs below 4:12, water flows slowly across the roof surface, giving it more time to find its way into any imperfection in the seal around the skylight frame. Low-slope skylight installations require a continuous self-adhering membrane, typically ice and water shield, extending at least six inches beyond the curb in all directions. Many contractors apply this membrane across the entire area beneath the step flashing and counter flashing, creating a redundant waterproof layer that protects against wind-driven rain and ice dam backup.
Standard-pitch installations between 5:12 and 8:12 use manufacturer-supplied flashing kits that integrate with the most common roofing materials. These kits include step flashing pieces that weave between shingle courses along the skylight's sides, a head flashing that diverts water around the top edge, and an apron flashing at the bottom that channels runoff back onto the roof surface below. When installed according to manufacturer instructions, these kits provide reliable waterproofing that carries a warranty period matching the skylight unit itself, typically 10 to 20 years depending on the product line. The critical detail is that each piece of step flashing must extend at least four inches under the shingle above and four inches up the curb face, creating overlapping shields that direct water outward at every joint.
Steep-pitch roofs above 9:12 present a counterintuitive advantage for waterproofing: water velocity across the roof surface is high enough that it tends to sheet past the skylight without pausing to probe seam imperfections. However, the steep angle creates a different risk. The sealant and flashing at the top (head) of the skylight must withstand a column of water that builds momentum as it flows down the roof and strikes the upper flashing edge with considerable force. Head flashing on steep pitches should incorporate a diverter or cricket, a small peaked structure that splits the water flow and channels it around both sides of the skylight. Without a cricket, the head flashing bears the full impact of the water column during heavy rain, which can eventually force water beneath the flashing edge through hydraulic pressure alone.
Regardless of pitch, every skylight installation should include a post-installation water test before interior finishing begins. A garden hose directed at the skylight from above the head flashing, working slowly downward, reveals any leaks while the interior framing is still exposed and repairs are straightforward. What specific warranty coverage does your chosen skylight manufacturer provide for flashing failures, and does that warranty require installation by a certified contractor? These are questions worth answering before signing any installation contract, as warranty terms vary significantly between manufacturers and between product lines within the same brand.
Energy Performance Across Different Roof Angles
A skylight is essentially a hole in the most thermally vulnerable surface of your home, and its energy impact depends heavily on the glazing specification, the roof pitch, and the orientation relative to the sun's path. The National Fenestration Rating Council (NFRC) rates skylights on four metrics: U-factor (heat transfer rate), Solar Heat Gain Coefficient (SHGC), Visible Transmittance (VT), and Air Leakage. For heating-dominated climates, a low U-factor and moderate SHGC allow the skylight to retain interior heat while admitting beneficial solar warmth. For cooling-dominated climates, a low SHGC reduces unwanted heat gain that would otherwise increase air conditioning loads.
Roof pitch directly modifies how much solar radiation strikes the skylight surface at any given time of year. According to research published by the Lawrence Berkeley National Laboratory, a south-facing skylight on a 45-degree roof in a northern U.S. city receives approximately 40 percent more solar radiation in winter than the same skylight on a 20-degree roof, because the steeper angle aligns more closely with the low winter sun angle. In summer, the relationship reverses: the low-pitch skylight faces more directly into the high summer sun and admits more heat. This seasonal dynamic means that steep-pitch skylights in cold climates deliver passive solar heating benefits that partially offset winter heating costs, while low-pitch skylights in hot climates may require glazing with a very low SHGC to prevent overheating.
Double-pane Low-E glazing is the minimum standard for energy-efficient skylight installations and is now required by energy codes in most U.S. jurisdictions. Triple-pane options with argon or krypton gas fill between the panes offer superior insulation performance, with U-factors as low as 0.19 compared to 0.29 for standard double-pane units. The cost premium for triple-pane glazing is typically $150 to $300 per unit, a modest investment that pays back through reduced heating and cooling costs over the 20-to-30-year lifespan of the skylight. For homeowners in extreme climates, whether hot or cold, triple-pane glazing combined with a motorized shade or blind that can be deployed during peak heat or cold transforms the skylight from an energy liability into a net energy contributor.
Solar-powered blinds integrated into the skylight assembly offer a practical solution for managing heat gain without sacrificing the light benefits that motivated the installation in the first place. These blinds, available from both Velux and Fakro as factory-installed options, use a small photovoltaic cell mounted on the skylight frame to power a motor that opens and closes the blind on a programmable schedule or via remote control. The ENERGY STAR program recognizes qualifying skylights with integrated blinds as eligible for its certification, and federal tax credits of up to 30 percent of the installed cost are available for ENERGY STAR-rated skylight products through the Inflation Reduction Act, making the upgrade financially accessible for many homeowners.
Selecting a Contractor and Managing the Installation Timeline
The quality of a skylight installation depends almost entirely on the skill and experience of the installer, making contractor selection the most consequential decision in the entire project. Skylight installation is a specialized discipline that combines roofing, framing, waterproofing, and interior finishing, and a contractor who excels at general roofing may lack the specific experience needed to execute the flashing details, light well construction, and interior trim that a skylight demands. Request references from previous skylight projects specifically, not just roofing jobs, and ask to see photos of completed installations on roofs with a pitch similar to yours. A contractor who has installed 50 skylights on moderate-pitch suburban homes may not be the right choice for a steep-pitch installation on a historic property.
The typical installation timeline for a single skylight on a moderate-pitch roof is one to two days, with the first day devoted to roof opening, framing, flashing, and weatherproofing, and the second day focused on interior light well construction, insulation, drywall, and trim. Steep-pitch installations may extend to three days due to the additional time required for safety setup and the slower pace of work on an incline. Projects involving multiple skylights can often be batched efficiently, with marginal time added for each additional unit after the first, because the scaffolding, safety equipment, and crew mobilization costs are shared across all units. Planning the installation during a stretch of dry weather is essential, as the roof opening must remain weatherproof overnight if the project spans multiple days.
Building permits are required for skylight installations in virtually all U.S. municipalities, as the project involves structural modifications to the roof framing and must comply with local energy and building codes. The permit process typically takes one to three weeks and costs $100 to $500 depending on the jurisdiction. Your contractor should handle the permit application and schedule the required inspections, which usually include a framing inspection after the roof opening is cut and headers are installed, and a final inspection after the project is complete. Skipping the permit process to save time or money creates serious risks: unpermitted work can void your homeowner's insurance coverage for any future water damage, and it must be disclosed when selling the property, potentially complicating the transaction.
Before committing to a contractor, consider asking these questions: How many skylight installations have you completed on roofs with my specific pitch? Do you use manufacturer-supplied flashing kits or custom-fabricate your own? Will the installation include a water test before interior finishing? What is your warranty on labor, separate from the manufacturer's product warranty? A contractor who answers these questions confidently and provides documentation to support their claims is far more likely to deliver an installation that performs well for the full life of the skylight. Investing the time to vet your installer thoroughly is the single most effective step you can take to protect your skylight investment.
Conclusion
Skylight installations are not one-size-fits-all projects, and roof pitch is the variable that most dramatically influences cost, product selection, waterproofing strategy, and energy performance. Homeowners with low-pitch roofs should budget for enhanced flashing systems and potentially taller curbs, while those with steep-pitch roofs must account for the significant labor premium that safety requirements impose. Understanding these pitch-specific factors before soliciting bids allows you to evaluate contractor proposals on an informed basis and avoid the unpleasant surprise of mid-project cost escalations.
The sizing decision deserves equal attention, as the right skylight dimensions depend not just on the room below but on the structural implications of cutting into your roof framing. Standard sizes that fit between existing rafters minimize cost and complexity, while oversized units deliver more light and visual impact at the expense of additional framing work and higher installation costs. Matching the skylight size to both the room's lighting needs and the roof's structural constraints produces the best balance of performance and value.
Energy performance considerations add another layer of decision-making that roof pitch directly affects. A south-facing skylight on a steep pitch captures valuable winter sun in cold climates, while the same configuration on a low pitch may create uncomfortable heat gain in warm regions. Selecting the appropriate glazing specification, whether double-pane or triple-pane with Low-E coating, and adding motorized blinds or shades gives you the ability to modulate the skylight's energy contribution throughout the seasons rather than simply accepting whatever conditions the fixed glazing and roof angle dictate.
Ready to bring natural light into your home through a well-planned skylight installation? Start by measuring your roof pitch with a pitch gauge or smartphone inclinometer app, then use the cost ranges and sizing guidelines in this article to develop a realistic project budget before reaching out to contractors for bids.
More Articles You May Like


Comments
Post a Comment