Checkerboard Floor Tiles: Classic Pattern in Kitchens and Baths
A Pattern With Centuries of Staying Power
The checkerboard floor pattern has appeared in palaces, cathedrals, farmhouses, and diners for hundreds of years, and it remains as compelling today as it was in the grand halls of Versailles. This alternating grid of two contrasting colors creates a sense of rhythm, order, and visual energy that few other floor patterns can match. Its longevity in the design canon is not accidental. The checkerboard works because it is simultaneously simple enough to serve as a background and bold enough to anchor an entire room's aesthetic direction.
What makes the checkerboard particularly suited to kitchens and bathrooms is its ability to bring graphic punch to rooms that are often dominated by cabinetry, appliances, and fixtures. In these functional spaces, the floor is one of the few uninterrupted surfaces available for making a design statement. A checkerboard pattern transforms this utilitarian plane into a deliberate design element that ties the room together and gives the eye a satisfying visual rhythm to follow. The pattern's geometric regularity also helps smaller rooms feel more structured and intentional.
The Tile Council of North America (TCNA) notes that geometric patterns, including checkerboard layouts, have maintained a consistent 15 to 20 percent share of residential tile installations over the past decade. This stability suggests that checkerboard floors are not a trend but a permanent fixture in the design vocabulary. While other patterns rise and fall in popularity, the checkerboard persists because it transcends specific style movements. It is equally at home in a retro-inspired kitchen, a contemporary bathroom, and a traditional entry hall.
The psychology of the pattern contributes to its endurance. Alternating squares create a strong sense of order that is inherently satisfying to the human brain, which is wired to detect and appreciate regular patterns. At the same time, the contrast between the two colors introduces just enough visual tension to keep the floor interesting rather than monotonous. This balance between order and energy is the secret ingredient that makes checkerboard floors feel simultaneously calming and lively, a combination that serves both kitchens and bathrooms well.
Choosing the Right Tile Material
The material you select for your checkerboard floor determines not only its appearance but also its durability, maintenance requirements, and cost. Ceramic tile is the most budget-friendly option and performs well in both kitchens and bathrooms. Modern ceramic tiles are available in an enormous range of colors, and their glazed surfaces resist staining and moisture effectively. For a classic black-and-white checkerboard, basic ceramic tiles can deliver the look for as little as $3 to $5 per square foot, making this an accessible option for homeowners on a budget.
Porcelain tile steps up the durability significantly. Fired at higher temperatures than ceramic, porcelain is denser, harder, and more resistant to water absorption. The American National Standards Institute (ANSI) classifies porcelain as having a water absorption rate of 0.5 percent or less, compared to up to 7 percent for standard ceramic. This makes porcelain the superior choice for bathroom floors where standing water is common and for kitchen floors that endure heavy foot traffic and frequent mopping. The cost premium over ceramic, typically $2 to $4 more per square foot, is well justified by the performance improvement.
Natural stone checkerboard floors occupy the premium end of the spectrum. Marble is the quintessential choice, with a combination like Carrara white and Nero Marquina black creating a floor of extraordinary elegance. Limestone, travertine, and slate also work beautifully in checkerboard layouts, each bringing its own textural character. Natural stone requires sealing and more attentive maintenance than ceramic or porcelain, but the depth, variation, and luminosity of real stone is something that even the best porcelain cannot fully replicate.
Vinyl and linoleum represent the practical end of the material spectrum for checkerboard floors. High-quality luxury vinyl tile (LVT) can mimic the appearance of marble or ceramic at a fraction of the cost, while providing cushioned comfort underfoot and excellent water resistance. For rental properties, budget renovations, or rooms where maximum practicality outweighs material authenticity, vinyl checkerboard floors deliver the visual impact of the pattern without the installation complexity or cost of tile or stone. Manufacturers like Armstrong Flooring and Mannington produce convincing checkerboard vinyl options in various color combinations.
Step-by-Step Layout Planning
A successful checkerboard installation begins long before any tile is set in mortar. The first and most critical step is finding the center of the room and snapping chalk lines to create a grid that ensures the pattern is symmetrical from wall to wall. Starting from the center rather than a wall edge means that any partial tiles at the room's perimeter will be equal on opposite sides, creating a balanced appearance. Rooms that are not perfectly square, which includes most rooms in real homes, require careful measurement and adjustment at this stage.
Tile size significantly affects the final appearance of the pattern. Smaller tiles, such as four-inch or six-inch squares, create a busier, more intricate pattern that suits smaller powder rooms and vintage-inspired designs. Larger tiles in the twelve-inch to eighteen-inch range produce a bolder, more contemporary look with fewer grout lines. The Houzz design community frequently debates the ideal tile size for checkerboard floors, and the consensus leans toward matching tile scale to room scale. Smaller rooms generally look better with smaller tiles, while spacious kitchens can handle larger formats without the pattern feeling overwhelming.
Have you thought about how your grout color will affect the finished pattern? In a traditional black-and-white checkerboard, medium gray grout creates the most cohesive appearance because it bridges the contrast between the two tile colors. White grout emphasizes the grid lines around the black tiles, while black grout does the same around the white tiles. Both of these options can create a busier visual effect than most homeowners intend. Testing grout color on a sample layout before committing to the full installation is a small investment that prevents significant regret.
Diagonal versus straight layout is another decision that fundamentally changes the pattern's character. A straight-set checkerboard, with tiles aligned parallel to the walls, is the classic and most common orientation. A diagonal-set checkerboard, with tiles rotated 45 degrees, creates a more dynamic, diamond-like effect that can make narrow rooms feel wider. Diagonal layouts require more cutting at the walls and generate more material waste, typically 15 to 20 percent more than straight layouts. Factor this waste into your material calculations to avoid running short during installation.
Color Combinations Beyond Black and White
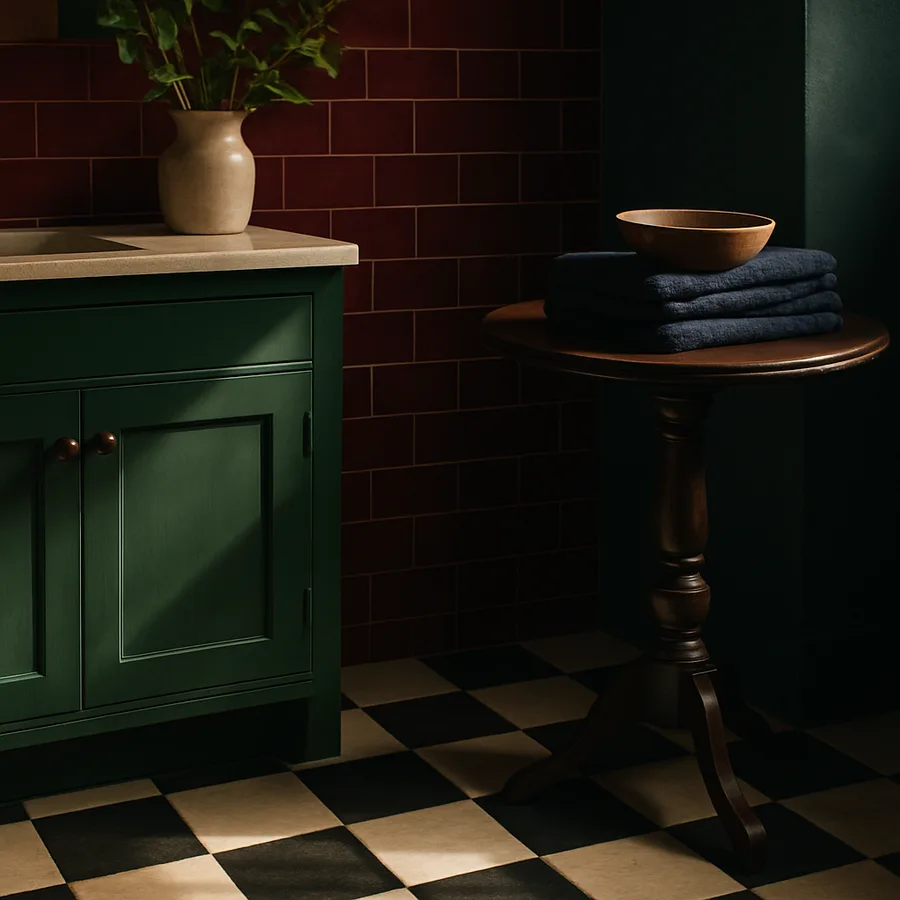
While black and white is the iconic checkerboard combination, limiting yourself to these two colors means missing a world of possibilities. Sage green and cream create a soft, garden-inspired checkerboard that works beautifully in cottage kitchens and country bathrooms. Navy and white deliver nautical sophistication for coastal homes. Terracotta and cream evoke Mediterranean warmth that suits Spanish Colonial and Tuscan-inspired interiors. The pattern itself is the constant; the color palette is where personalization happens.
Tonal checkerboards, which use two shades of the same color family, offer a subtler interpretation of the pattern for homeowners who want geometric interest without high contrast. A floor alternating between pale gray and medium gray tiles creates a sophisticated, understated checkerboard that reads as textured and dimensional rather than graphic and bold. This approach works exceptionally well in modern bathrooms where a strong black-and-white pattern might compete with other design elements like patterned wallpaper or statement vanities.
The American Society of Interior Designers published research showing that multi-tone floor patterns in kitchens correlate with higher homeowner satisfaction scores compared to single-tone floors, regardless of the specific colors chosen. The theory is that patterned floors add visual complexity that makes the room feel more complete and intentionally designed. A checkerboard achieves this complexity with only two colors and the simplest possible layout, which is part of its genius as a design solution.
When selecting your two colors, consider the room's fixed elements that cannot be changed. Your cabinetry color, countertop material, and wall paint will all interact with the floor. Bring samples of your tile options into the actual room and observe them under both natural and artificial light at different times of day. Colors that look perfect under showroom lighting can shift dramatically in your home's specific light conditions. This testing step is particularly important for tonal combinations where the subtle contrast between the two colors needs to remain visible in all lighting scenarios.
Common Installation Mistakes and How to Avoid Them
The most frequent mistake in checkerboard floor installations is inadequate substrate preparation. Tile requires a flat, stable surface to prevent cracking and lippage, which is the condition where adjacent tile edges sit at slightly different heights. The TCNA recommends that the substrate be flat to within one-eighth of an inch over ten feet for tiles with any edge longer than fifteen inches. In older homes with uneven subfloors, a self-leveling compound applied before tiling is essential for achieving the flat surface that a checkerboard pattern demands.
Inconsistent tile sizing is another problem that plagues checkerboard installations. Even within a single box of tiles, individual pieces can vary by a millimeter or more in dimension. These tiny differences become glaringly obvious in a checkerboard layout because the grid pattern highlights any deviation from perfect alignment. Rectified tiles, which are precision-cut to exact dimensions after firing, solve this problem but cost more than non-rectified options. For a checkerboard floor, the investment in rectified tiles is almost always worthwhile because the pattern's regularity depends on consistent tile dimensions.
Rushing the layout dry-fit is a mistake that even experienced installers sometimes make. Before any adhesive is applied, the entire checkerboard should be dry-laid on the floor to verify the pattern, check the centering, and identify any problem areas where partial tiles will be needed. This process reveals issues that are easy to fix before setting but extremely difficult and expensive to correct afterward. Allow at least two hours for dry-fitting a standard kitchen or bathroom floor, more for complex room shapes with alcoves, peninsulas, or angled walls.
Grout joint width deserves more attention than it typically receives. For a checkerboard floor, consistent grout joint width is critical because the pattern's visual integrity depends on the grid being perfectly regular. Using tile spacers at every joint and checking alignment frequently during installation prevents the gradual drift that can cause tiles to go visibly off-pattern by the time you reach the far wall. A grout joint of one-sixteenth to one-eighth of an inch works best for most checkerboard installations, minimizing the visual impact of the grout while allowing enough room for proper adhesive coverage and seasonal movement.
Maintaining Checkerboard Floors for Lasting Beauty
Keeping a checkerboard floor looking sharp requires attention to both the tiles and the grout. For ceramic and porcelain tiles, routine maintenance is straightforward: sweep or vacuum regularly to remove grit that can scratch glazed surfaces, and mop weekly with a pH-neutral tile cleaner. Avoid vinegar-based cleaners on natural stone checkerboard floors, as the acid will etch and dull calcareous stones like marble and limestone. The Better Homes & Gardens cleaning experts recommend dedicated stone cleaners for natural material checkerboard floors to preserve their finish and sealer.
Grout maintenance is arguably more important than tile maintenance for preserving a checkerboard floor's appearance. Light-colored grout lines between dark tiles show every speck of dirt, while dark grout lines between light tiles can develop a chalky, faded look over time. Sealing grout joints immediately after installation and resealing annually significantly reduces staining and simplifies cleaning. Epoxy grout, while more expensive and difficult to install than standard cement grout, offers superior stain resistance and may be worth considering for kitchen checkerboard floors where food spills are inevitable.
Natural stone checkerboard floors need periodic resealing to maintain their stain resistance. The frequency depends on the stone type and the level of traffic the floor receives. A kitchen floor may need resealing every six months, while a lightly used powder room floor can go twelve to eighteen months between applications. Testing the seal is simple: place a few drops of water on the stone surface and wait five minutes. If the water beads on the surface, the seal is intact. If it absorbs into the stone, leaving a dark spot, it is time to reseal.
What happens when a single tile in your checkerboard cracks or chips? The good news is that individual tiles can be replaced without redoing the entire floor. A skilled installer can remove a damaged tile by carefully cutting through the surrounding grout, chiseling out the tile and adhesive, and setting a replacement piece. This is one reason to purchase approximately 10 percent more tile than your measurements require and store the extras for future repairs. Matching tile color and pattern from a different production lot months or years later can be surprisingly difficult, so having spare tiles on hand is a worthwhile precaution.
Conclusion: A Pattern Worth Committing To
The checkerboard floor tile pattern endures because it solves a fundamental design problem: how to make a floor interesting without making it complicated. Two colors, one simple grid, and the result is a surface that adds energy, structure, and personality to kitchens and bathrooms of every style. Whether rendered in luxurious marble or practical porcelain, in classic black-and-white or a custom color pairing, the checkerboard delivers design impact that is disproportionate to its simplicity.
The technical requirements for a successful installation are real but achievable. Proper substrate preparation, careful centering and layout, consistent tile sizing, and precise grout joints are the non-negotiable elements that separate a professional-looking checkerboard from an amateurish one. Investing in quality materials and skilled installation labor pays for itself in a floor that looks impeccable for decades rather than deteriorating within a few years.
If the checkerboard floor has spoken to you while reading this guide, the next step is simple: visit a tile showroom with your room measurements and begin experimenting with color combinations and tile sizes. Hold samples against your cabinetry and countertop materials. Walk on installed checkerboard displays to feel the pattern's scale underfoot. The right combination will resonate immediately, and from there, your classic checkerboard kitchen or bathroom floor is just an installation away.
Download our free checkerboard floor planning worksheet to calculate your tile quantities, map your layout from center point, and keep your installation on track from start to finish.
More Articles You May Like


Comments
Post a Comment