Smart Thermostat Wall Placement That Blends With Your Decor
Why Thermostat Placement Matters More Than You Think
Most homeowners install a smart thermostat wherever the old one sat, screw it into the wall, connect it to the app, and never think about placement again. This is a missed opportunity on two fronts. First, the location of your thermostat directly affects how accurately it reads your home's temperature, which in turn determines how efficiently your HVAC system operates. Second, that small glowing rectangle sits on your wall every single day, occupying visual real estate in rooms you have otherwise designed with care. Getting placement right solves both problems simultaneously.
The U.S. Department of Energy estimates that heating and cooling account for roughly 48 percent of energy use in the average American home, making the thermostat one of the most consequential devices in the entire house. A thermostat mounted in the wrong location, near a sunny window, above a heat-producing appliance, or in a drafty hallway, will receive inaccurate temperature readings and respond by running the HVAC system when it should not or failing to run it when it should. The result is wasted energy, uneven comfort, and higher utility bills. Smart thermostats with learning algorithms are particularly sensitive to placement because their efficiency gains depend entirely on receiving accurate data.
From a design perspective, the challenge is that thermostats are fundamentally utilitarian objects placed in highly visible locations. They sit at eye level on prominent walls, often in living rooms, hallways, and open-plan spaces where every design choice is on display. A white plastic rectangle on a carefully painted accent wall or a glowing screen in the middle of a gallery arrangement can disrupt the visual flow of a room. The good news is that with thoughtful placement and a few design strategies, your thermostat can become nearly invisible or even a contributing element in your decor.
Have you ever rearranged furniture or hung new artwork only to realize the thermostat is now awkwardly prominent? You are not alone. The National Association of Home Builders (NAHB) reports that thermostat placement is among the top ten items homeowners wish they had addressed during new construction or renovation, ranking alongside outlet placement and light switch locations. Unlike those hardwired elements, however, a thermostat can often be relocated with modest effort and significant benefit.
Technical Requirements for Accurate Readings
Before considering aesthetics, it is essential to understand the technical constraints that govern where a smart thermostat can perform accurately. These devices contain temperature sensors and, in many models, humidity sensors and occupancy detectors that rely on stable ambient conditions to function correctly. Violating the technical placement guidelines will undermine the device's core purpose, no matter how beautiful the wall position looks.
The thermostat should be mounted on an interior wall, meaning a wall that does not face the exterior of the house. Exterior walls are subject to temperature transfer from outside conditions, which skews the sensor reading. The ideal height is between 52 and 60 inches from the floor, roughly at the breathing zone where you actually experience the room's temperature. Mounting it too high places the sensor in the warm air layer that accumulates near the ceiling, while mounting it too low exposes it to cooler floor-level air.
Keep the thermostat away from direct sunlight, which can heat the sensor and cause the air conditioning to run excessively. A minimum distance of three feet from windows is a reasonable guideline. Similarly, avoid walls adjacent to kitchens, laundry rooms, or bathrooms where heat and humidity from cooking, drying, and showering create localized climate conditions that do not represent the home's overall temperature. The Air Conditioning Contractors of America (ACCA) recommends placing thermostats in rooms where occupants spend the most waking hours, typically the living room or family room, to ensure the system optimizes for comfort in the spaces that matter most.
Airflow around the device is another consideration. The thermostat should not be recessed into a niche, placed behind a door that is frequently open, or blocked by furniture, curtains, or large artwork placed directly in front of it. The sensor needs free air circulation to take accurate readings. This does not mean the thermostat must sit on an empty, featureless wall, but it does mean that any decorative strategy must preserve at least four to six inches of clearance on all sides. Supply vents and return air registers should be at least ten feet away to prevent conditioned air from directly hitting the sensor.
Five Placement Strategies That Prioritize Both Function and Design
Strategy one: the gallery wall integration. Rather than treating the thermostat as a standalone object to hide, incorporate it into a larger wall arrangement. A gallery wall of framed photographs, prints, or small art pieces can be composed so that the thermostat sits within the arrangement as one element among many. The key is spacing. Place frames close enough to the thermostat that the eye reads the entire wall as a unified composition, but maintain the required clearance for accurate sensor readings. A four-inch gap between the thermostat and the nearest frame preserves airflow while looking intentional.
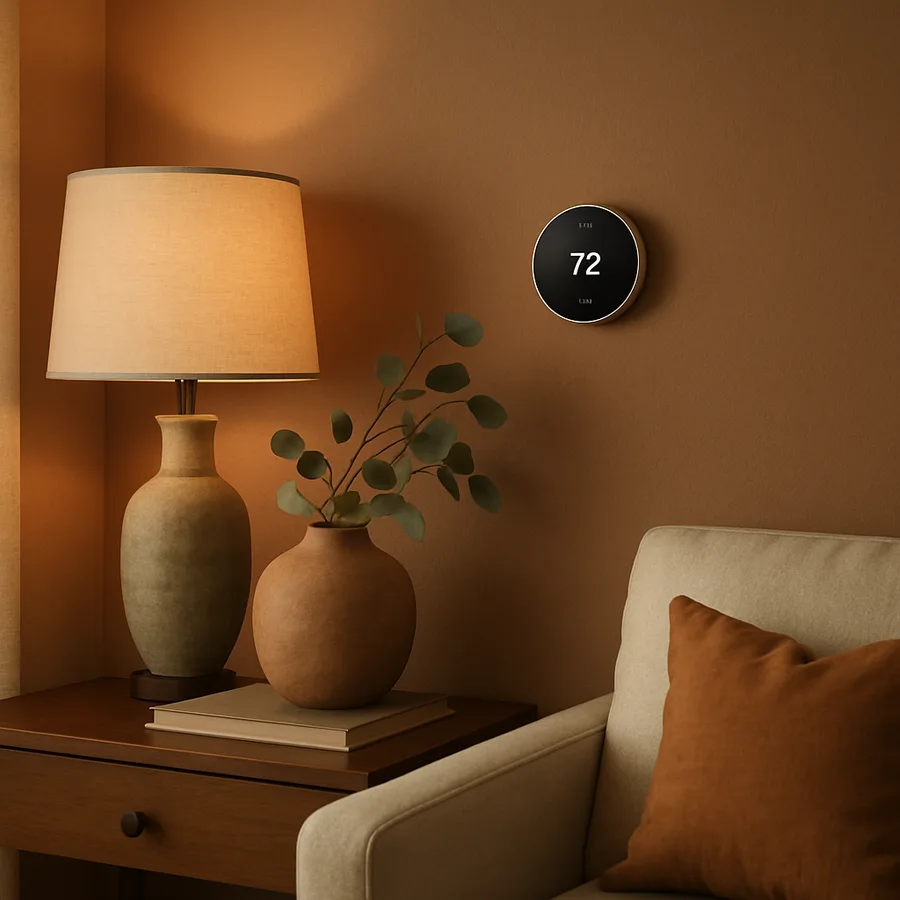
Strategy two: the shelf-and-plant approach. Mount a floating shelf six to eight inches above the thermostat and place a small trailing plant on the shelf so that a few tendrils fall near but not over the device. This draws the eye upward to the plant and shelf, making the thermostat a secondary element on the wall. The plant must not block the thermostat's sensor or screen, but a vine like pothos or string of pearls with a few cascading strands creates just enough visual softness to reduce the device's prominence. According to Better Homes and Gardens, combining functional hardware with natural elements is one of the most effective techniques for integrating technology into designed spaces.
Strategy three: the accent wall color match. Most smart thermostats come in white, but several brands now offer interchangeable faceplates in a range of colors and finishes. Choose a faceplate that closely matches the wall color behind it. On a warm white wall, a white faceplate disappears almost entirely. On a darker accent wall, a dark faceplate achieves the same effect. Some manufacturers also offer metallic faceplates in brass, copper, and brushed nickel that can coordinate with nearby hardware such as light switch plates, door handles, or picture hanging systems. This approach requires no wall modification at all and works in any room.
Strategy four: the utility wall cluster. In many homes, the thermostat shares a wall with a light switch, an alarm panel, or an intercom unit. Rather than spreading these devices across multiple walls, cluster them in a single vertical alignment on one wall and treat that wall as the designated utility zone. Frame the cluster with a pair of sconces, a tall narrow bookcase, or vertical artwork on either side to create a flanked composition that gives the technology a designed context. This strategy is particularly effective in hallways and entryways where multiple control devices often converge.
Strategy five: the nook or alcove placement. If your home has architectural niches, recessed shelving, or built-in cabinetry with open sections, mounting the thermostat inside a shallow nook can reduce its visual impact while still allowing adequate air circulation. The nook should be at least twelve inches wide and six inches deep, with no door or cover that would trap air. This works especially well in homes with traditional architectural details where built-in features are already part of the design vocabulary. The thermostat reads as just another object on the shelf rather than a tech device mounted on a wall.
Choosing the Right Thermostat Model for Your Interior Style
Not all smart thermostats are created equal from a design standpoint, and choosing a model that complements your interior style makes the integration challenge significantly easier. The market now offers enough variety that you can find a thermostat to suit spaces ranging from ultra-modern to traditionally detailed, provided you know what to look for.
For minimalist and contemporary interiors, devices with clean circular or rounded-square forms and minimal visible hardware integrate most seamlessly. Several models feature edge-to-edge displays that show the temperature as a floating number against a dark background, creating a sleek, almost jewelry-like appearance on the wall. The small footprint and absence of visible mounting screws give these devices an object quality that can actually enhance a modern space rather than detracting from it.
For traditional, farmhouse, or transitional interiors, the design challenge is greater because most smart thermostats look inherently modern. In these settings, the color-matching and gallery-wall strategies described above become especially important. Some homeowners in traditionally styled homes opt for smart thermostat models that accept third-party decorative wall plates designed to mimic the look of old-fashioned circular thermostats or vintage switch plates. These aftermarket accessories add a border or frame around the device that softens its modern appearance. The Houzz marketplace lists dozens of such decorative plates in finishes ranging from antique brass to oil-rubbed bronze.
For eclectic and maximalist interiors, the thermostat is least likely to cause visual disruption because these spaces already contain a diverse mix of objects, textures, and styles. In a room where a vintage clock, a collection of masks, a neon sign, and a woven tapestry share the same wall, a smart thermostat is simply another object in the composition. In these settings, lean into the device's modern form rather than trying to disguise it. A round thermostat with a bright display can function as a contemporary accent piece in an otherwise analog-feeling room.
Relocating an Existing Thermostat: What to Know
If your current thermostat sits in a location that is both technically suboptimal and aesthetically problematic, relocation may be the best long-term solution. This is a more involved project than simply mounting a new faceplate, but it is well within the scope of a skilled homeowner or a licensed electrician, and the benefits to both comfort and design can be substantial.
The thermostat connects to your HVAC system via low-voltage wiring, typically 24 volts, that runs through the wall cavity. Relocating the device means running new wire from the HVAC control board to the new wall location, which requires either fishing wire through existing walls or running it through the attic or basement and down into the target wall. In a single-story home with attic access, this is a straightforward project that most electricians can complete in one to two hours. In multi-story homes or homes with finished walls on all sides, the wiring route may be more complex.
Before committing to a new location, test it temporarily. Most smart thermostats have remote temperature sensors that can be placed in different rooms to supplement or override the main unit's readings. Place a remote sensor in the proposed new location for a week and monitor whether the system maintains comfortable temperatures throughout the home. If the remote sensor location performs well, you can proceed with confidence that the permanent relocation will succeed. The Environmental Protection Agency's Energy Star program reports that properly placed smart thermostats save households an average of eight percent on heating and cooling costs, a figure that depends heavily on sensor accuracy and therefore on correct placement.
What if relocation is not feasible due to wiring constraints or rental restrictions? In that case, maximize the design integration strategies at the existing location. Even a poorly placed thermostat can be made less visually intrusive with the right combination of color matching, surrounding decor, and intentional wall composition. The goal is not to make the thermostat invisible, which is rarely possible, but to make it feel like a considered part of the wall's design rather than an afterthought bolted onto it.
Maintaining Performance After Installation
Once your thermostat is properly placed and aesthetically integrated, a few ongoing practices ensure it continues to perform well and look good over time. Dust accumulates on sensors and screens just as it does on picture frames and shelving, and a monthly wipe with a dry microfiber cloth keeps the display clear and the sensors unobstructed. Avoid using liquid cleaners on the thermostat, as moisture can damage the electronics.
If you rearrange furniture or add new decor to the wall, reassess whether the thermostat's airflow clearance remains adequate. A new bookcase placed three feet away is fine; a heavy curtain hung directly beside the thermostat could trap air and affect readings. Similarly, if you install a new floor lamp or table lamp near the thermostat, verify that the bulb's heat output is not warming the sensor. LED bulbs produce minimal heat and are generally safe in proximity to thermostats, but halogen or incandescent bulbs can raise ambient temperature enough to cause false readings at close range.
Seasonal checks are worthwhile as well. In summer, confirm that afternoon sun has not shifted to fall directly on the thermostat due to the sun's higher angle. In winter, check that holiday decorations or seasonal textiles have not inadvertently blocked the device. The Architectural Digest home technology editors recommend a biannual thermostat audit, conducted at each seasonal transition, to verify that placement remains optimal as both your decor and the sun's path change throughout the year.
Does your thermostat's current location frustrate you every time you look at the wall? Take action now rather than tolerating a problem that compounds every day. Whether you choose a simple faceplate swap, a creative gallery wall integration, or a full relocation, the investment of time and modest expense pays dividends in both daily comfort and design satisfaction. Download our free thermostat placement checklist and wall-styling templates from the Interior Bliss resource library to plan your project step by step. A smarter thermostat deserves a smarter spot on your wall.
More Articles You May Like


Comments
Post a Comment