Reverse Osmosis Water Filter Under Sink Installation
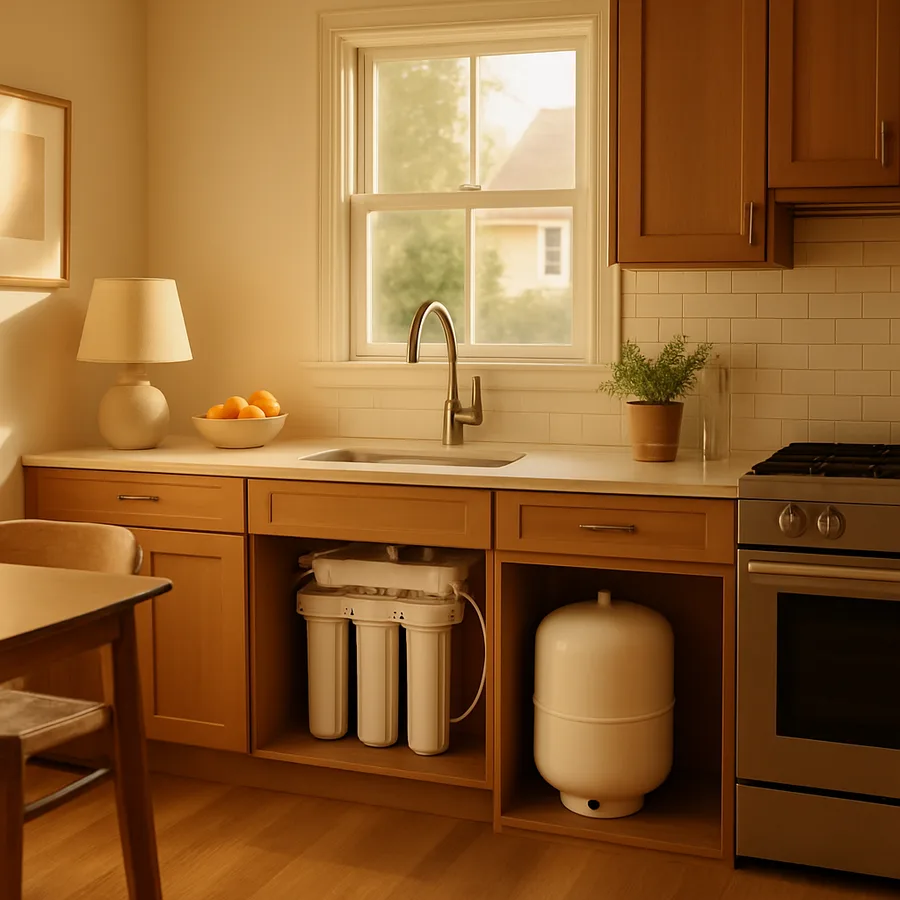
An under-sink reverse osmosis (RO) system is one of the most effective water treatment upgrades a homeowner can make, and one of the most intimidating ones to install yourself. The technology is genuinely impressive: a semipermeable membrane pushes pure water through molecular-scale pores while rejecting dissolved solids, lead, nitrates, fluoride, arsenic, and most pharmaceuticals. The EPA classifies reverse osmosis among the few technologies effective against the broadest spectrum of contaminants, and certified residential systems can reduce total dissolved solids by 95 to 99 percent. But for all that performance, the system is just five filters, a tank, and a faucet, and the installation is well within reach of a confident weekend DIYer.
Choosing the Right System Before You Buy
Not all reverse osmosis systems are created equal, and the most important decision happens before you open a single box. Look for NSF/ANSI 58 certification, which is the specific standard for reverse osmosis drinking water systems. NSF's water treatment certification page explains that NSF/ANSI 58 confirms a system's ability to reduce specific contaminants under documented flow and pressure conditions, and many states require this certification for residential RO equipment. The WQA Gold Seal is an equivalent mark using the same protocol.
System types fall into three buckets. Traditional four- or five-stage tank systems are the most common and best-tested design: sediment pre-filter, carbon pre-filter, membrane, post-carbon polishing filter, and a 3- to 4-gallon pressurized storage tank. Tankless RO systems use internal pumps and high-flow membranes to produce water on demand without a storage tank, taking up less cabinet space but requiring electrical power. Whole-house RO exists but is overkill for almost every residential application and is generally not recommended outside of specific high-contaminant well situations.
For most homes on municipal water, a five-stage NSF-certified tank system in the 50 to 75 gallon-per-day production range is the right answer. Have you checked your incoming water pressure recently? RO membranes require at least 40 psi to function efficiently and 60 to 80 psi for best performance. If your house pressure runs below 40 psi, you will need either a booster pump add-on or a permeate pump, and that should factor into your purchase decision.
Tools, Materials, and Pre-Installation Planning
Before turning a single wrench, assemble everything in advance. You will need an adjustable wrench, basin wrench for the faucet nut, a sharp utility knife for tubing cuts, a cordless drill with sharp metal and ceramic bits, plumber's tape (PTFE), a small bucket and towels, and a flashlight. The kit typically includes the manifold or filter housings, the membrane, the storage tank, the dedicated faucet, color-coded tubing, the feed-water adapter, the drain saddle clamp, and a tank valve.
Plan the layout inside your cabinet before drilling anything. The storage tank should sit upright with its valve accessible, typically along the back wall of the cabinet. The filter manifold mounts on a side wall or the cabinet back, with enough clearance below for filter changes, usually 6 to 8 inches. The dedicated faucet needs a 1/2-inch hole in the countertop or sink deck. Modern sinks often include a covered "soap dispenser" hole that is perfectly suited to this purpose.
Check your local code first. The IAPMO Uniform Plumbing Code and the International Plumbing Code both require an air gap on the RO drain line to prevent backflow contamination, and most jurisdictions require an air-gap faucet rather than a standard non-air-gap faucet. Inexpensive online systems sometimes ship with non-air-gap faucets to cut cost; verify your local code before installing one. The EPA recommends air-gap protection for any non-potable to potable cross-connection, and the air-gap faucet is the cleanest way to satisfy that requirement.
Connecting to the Cold Water Supply
The feed-water connection is the first plumbing intervention and the one that most homeowners worry about. The procedure is straightforward: shut off the cold water supply to the kitchen faucet, open the faucet to relieve pressure, disconnect the cold water supply line from the shutoff valve, install the included 1/4-inch needle valve adapter (saddle valve or angle-stop adapter) in line between the shutoff and the supply line, and route the 1/4-inch feed tubing from that adapter to the RO system's inlet port.
Two adapter styles dominate. The angle-stop adapter, sometimes called a tee-style adapter, is plumbed inline between the existing angle stop and the faucet supply riser, and provides a 1/4-inch compression port for the RO feed tubing. This is the code-preferred option in almost every jurisdiction because it makes a positive seal on copper or PEX rather than piercing the line. The saddle valve, by contrast, clamps around the supply pipe and uses a needle to pierce it. Saddle valves are easier to install but are explicitly prohibited by many local codes due to a higher leak rate over time.
Use thread tape on every threaded fitting, two to three wraps in the direction of tightening. Hand-tighten plus a quarter turn with a wrench is usually sufficient; over-tightening compression fittings can crack the brass nut or distort the ferrule. After connecting the feed adapter, turn the water on slowly and check every joint with a dry paper towel before moving to the next step. Catching a tiny weep now is much easier than discovering it tomorrow morning.
Installing the Drain Saddle and Drain Line
The reject water from the membrane, often called concentrate or simply drain water, must go to the sink drain. The traditional method uses a drain saddle clamp, a two-piece plastic or metal clamp that surrounds the tailpiece of the sink drain and accepts a 1/4-inch tube. The clamp's two halves come pre-aligned with a small hole; drill through the drain pipe at that hole with the supplied bit, install the gasketed clamp, tighten evenly, and push the 1/4-inch drain tube into the fitting.
Placement of the saddle matters more than installers often realize. The saddle should sit on the horizontal section of the drain tailpiece above the trap, never on the trap itself, and ideally on the vertical drop just below the sink basket. The drilled hole should be on the upper surface of horizontal sections so that water flows in by gravity rather than against the wastewater stream. The clamp must not interfere with the disposal mount if one is present; many installations place the saddle on the dishwasher branch tailpiece instead.
Air-gap installations route the drain line slightly differently. The drain tubing first goes to the air-gap port on the dedicated faucet, where it discharges into a small chamber open to atmosphere, then continues from the lower air-gap outlet down to the drain saddle. This double-run is the visible indicator that a system meets the air-gap requirement. Skipping the air gap to "simplify" the installation may violate your local plumbing code and definitely violates NSF/ANSI 58 certification conditions.
Mounting the Faucet, Tank, and Filter Housing
The dedicated RO faucet mounts in a 1/2-inch hole in the countertop, deck, or sink. If you do not have a pre-cut hole, drilling stainless or porcelain requires the right bits, patience, and a generous water dribble to keep the bit cool. For granite or quartz countertops, a diamond hole saw at low speed is required, and many homeowners hire a local fabricator for this one cut rather than risk a 2,000-dollar slab. Pre-cut holes in modern sinks are by far the easiest path.
Once the hole is ready, drop the faucet through with the supplied gasket and base, secure from below with the friction washer and mounting nut, and tighten with a basin wrench. Connect the 1/4-inch product water line (typically blue) to the faucet's compression inlet, and for air-gap models, connect the drain inlet and outlet to the appropriate tubing. Tighten only finger-tight plus a quarter turn; the faucet shell is brass over plastic in some models and will crack under heavy wrench pressure.
The storage tank installs on its valve, hand-tight, and then connects to the system manifold with 1/4-inch tubing. Before the very first fill, verify the tank's air pressure with a low-pressure tire gauge: it should read 5 to 7 psi when empty. If it reads less, add air with a hand pump through the Schrader valve under the blue cap. Tanks lose pressure over years and should be rechecked any time the system flow seems sluggish. Mount the manifold housing securely; a full housing weighs several pounds and a loose mount will rip out of drywall when you change filters.
Startup, Flushing, and Verifying Performance
Once everything is connected, open the cold water supply valve slowly while watching every joint with a flashlight. Then open the RO system's inlet valve, then the tank valve, in that order. Open the dedicated faucet and let it run; initially nothing will come out because the tank is empty and the membrane has not yet produced water. Over the next 30 to 60 minutes, you will hear and see the system slowly fill the tank from membrane production.
The first tank should be discarded entirely. Most manufacturers recommend filling and draining the tank two to three times before drinking, which flushes manufacturing residues, carbon dust from the post-filter, and preservative from the membrane. After the second or third fill, run the faucet for two minutes and collect a sample for a TDS (total dissolved solids) reading with an inexpensive handheld meter. Compare it to your incoming tap water TDS. A properly performing system should show at least a 90 percent reduction; most show 95 to 99 percent.
Annual maintenance is straightforward. Pre-filters (sediment and carbon) should be replaced every 6 to 12 months depending on incoming water quality. The post-carbon polishing filter replaces annually. The RO membrane itself lasts 2 to 5 years depending on usage and feed water hardness, and should be replaced when TDS rejection drops below 80 percent or production rate drops noticeably. Are you running RO water on hard, scale-forming source water without softening? Membrane life will be on the short end of that range, and adding a softener upstream extends it considerably.
Conclusion
Installing an under-sink reverse osmosis system is one of those projects that looks complicated in the box and feels surprisingly approachable two hours into the install. The fundamental operations, connecting tubing to compression fittings, clamping a drain saddle on a tailpiece, mounting a faucet through a deck hole, are familiar to anyone who has worked under a sink before. The system's apparent complexity is mostly the visual density of five filter housings, a tank, and a tangle of color-coded 1/4-inch tubing, all of which become obvious once unboxed and arranged on the cabinet floor.
The decisions that matter most happen before any wrench is turned. Buy an NSF/ANSI 58 or WQA Gold Seal certified system in the right production capacity for your household. Choose the angle-stop adapter over the saddle valve for the feed water tap. Use an air-gap faucet to satisfy plumbing code and certification requirements. Verify your incoming water pressure is adequate, and add a permeate pump if it is not. These choices, made before purchase, determine whether the system works reliably for a decade or fights you every year.
The performance payoff is substantial. The EPA recognizes reverse osmosis as effective against lead, arsenic, nitrate, perchlorate, fluoride, chromium, and a wide range of dissolved organics. For homes on private wells or in municipalities with aging infrastructure, an RO system is among the most consequential health upgrades available, and it costs less than many countertop appliances. A family of four typically produces 4 to 8 gallons of filtered water per day and changes pre-filters once or twice a year. Total operating cost averages under 100 dollars annually, a small price for water that consistently reads under 20 ppm TDS.
Order an NSF-certified five-stage system this week, gather the simple tools listed above, and dedicate one Saturday afternoon to the installation; by Sunday morning the dedicated faucet will be producing water that rivals any premium bottled brand at a fraction of the cost. Annual filter changes take 15 minutes. The membrane lasts years. The dedicated faucet quietly becomes the most-used fixture in the kitchen, and the cardboard-flat water bottle bin at the curb gradually disappears from the weekly recycling routine.
More Articles You May Like



Comments
Post a Comment