Beginner's Guide to Using Interior Design Apps for Effortless Home Makeovers
Walking into a room that needs a makeover can feel paralyzing when you have no formal design training and no clear starting point. The good news is that interior design apps have matured into practical tools that guide beginners through every stage of a room transformation, from measuring walls to selecting a final throw pillow. According to a 2024 survey by the American Society of Interior Designers (ASID), 61 percent of first-time renovators credited a design app with helping them avoid at least one costly mistake, such as ordering a sofa that was too large for the doorframe or painting a room a color that clashed with the fixed flooring. These are not toy apps or glorified Instagram filters; they are planning instruments that compress weeks of indecision into focused, productive sessions. This guide walks through the foundational skills every beginner needs to use design apps effectively, from the first room scan to the final purchase confirmation.
Getting Started: Setting Up Your First Project
The most important step happens before you open any app: measuring your room. Every design app operates on spatial data, and inaccurate dimensions cascade into every subsequent decision. Use a tape measure or, if your phone supports it, a LiDAR-based measurement app like Magicplan to capture the length and width of each wall, the positions of doors and windows, and the ceiling height. Record these numbers in a notebook or a notes app as a backup. Precision matters more than you might expect; even a two-inch error on a wall length can mean the difference between a console table that fits perfectly and one that blocks a light switch.
With measurements in hand, choose an app that matches your comfort level. Planner 5D and Homestyler are strong starting points for beginners because they offer template-based room creation alongside manual drawing. Templates let you select a room shape that approximates yours, then adjust the walls to match your measurements. This approach is faster than drawing from scratch and reduces the chance of spatial errors. Once the room shell is created, the app populates a toolbar with furniture, fixtures, and decorative items that you can drag into the space. Start with the largest items first, the bed, the sofa, the dining table, because they anchor the layout and constrain where everything else can go.
Resist the temptation to furnish the entire room in your first session. Experienced designers, including those certified by the National Council for Interior Design Qualification (NCIDQ), approach layout in layers: structure first, then seating, then storage, then lighting, then accessories. This layered approach prevents the overwhelm that comes from trying to make fifty decisions simultaneously. Save your project frequently; most apps auto-save, but a manual save before switching between 2D and 3D views prevents data loss from the occasional software glitch. Your first project will not be perfect, and it is not supposed to be. It is a learning exercise that teaches you how spatial relationships work in a digital environment.
Mastering Room Layout and Furniture Placement
Good furniture placement follows principles that are easy to learn and immediately impactful. The first principle is traffic flow: every room needs a clear path from each entry point to the primary activity zone. In a living room, that means an unobstructed route from the doorway to the seating area. In a bedroom, it means a clear line from the door to the bed without squeezing past a dresser. Design apps make traffic flow visible by displaying the floor plan from above, where blocked pathways are immediately obvious. Some apps even overlay suggested traffic lanes as dotted lines, which is a feature worth enabling if available.
The second principle is proportion. A massive sectional sofa in a small room makes the space feel cramped regardless of color or style. Apps solve this by rendering furniture at true scale within your measured room dimensions. The visual feedback is instant: drop a 96-inch sofa into a 10-by-12 room and you can see immediately that it dominates the wall and leaves inadequate clearance for a coffee table. Swap it for a 72-inch loveseat and the room breathes. The International Interior Design Association (IIDA) recommends that seating occupy no more than 40 percent of a living room's floor area, a guideline that apps make easy to test without memorizing the math. Simply furnish the room and eyeball the remaining open space.
The third principle is focal point orientation. Every room benefits from a single dominant element that draws the eye upon entry, whether that is a fireplace, a statement artwork, or a window with a compelling view. Arrange furniture to face or frame the focal point rather than ignoring it. In the app, rotate the 3D view to the room's entry angle and notice where your attention lands. If it lands on a blank wall while a beautiful window sits off to the side, the layout is fighting the room's natural strengths. Have you noticed how hotel lobbies always guide your sight toward their most impressive feature upon entry? The same principle applies at domestic scale, and a design app lets you test the effect from multiple angles before moving a single physical object.
Exploring Color Palettes and Material Combinations
Color selection intimidates beginners more than any other design decision because mistakes are highly visible and relatively expensive to correct. Design apps reduce the risk by letting users test unlimited color combinations on their actual room geometry. Upload a photo of your room to an app like Benjamin Moore's Color Portfolio or Sherwin-Williams' ColorSnap, and the software isolates wall surfaces so you can apply any paint color from the manufacturer's library. The on-screen representation is not a perfect match for the physical paint under your specific lighting conditions, but it is close enough to eliminate clearly wrong choices and narrow the field to two or three finalists worth purchasing as sample quarts.
Beyond wall color, material selection for flooring, countertops, and cabinetry requires understanding how surfaces interact with each other. A warm-toned oak floor paired with cool-toned grey cabinets can create a visual tension that makes a kitchen feel disjointed. Design apps that offer material swapping let you test these pairings virtually. The Japandi design aesthetic, which combines warm Japanese wood tones with cool Scandinavian whites, provides a useful framework for beginners because its palette is narrow and forgiving: light wood, white, black, and natural green. Plugging those four elements into a design app produces a cohesive room that requires no advanced color theory knowledge. Houzz's editorial team has published extensive guides on Japandi implementation that pair well with app-based experimentation.
A common beginner mistake is choosing colors in isolation rather than in context. A deep navy accent wall looks dramatic on a Pinterest board but might feel oppressive in a north-facing room that receives limited natural light. Design apps that simulate daylight movement across the room reveal how a color shifts from morning to evening, which is information a paint chip cannot provide. ASID recommends testing bold colors in rooms that receive ample south or west-facing light, where natural illumination prevents dark shades from closing in the space. If your room lacks natural light, the quiet luxury palette of warm neutrals, soft taupes, and textured creams achieves visual depth without the risk of darkness that saturated colors carry.
Using Augmented Reality for Real-World Validation
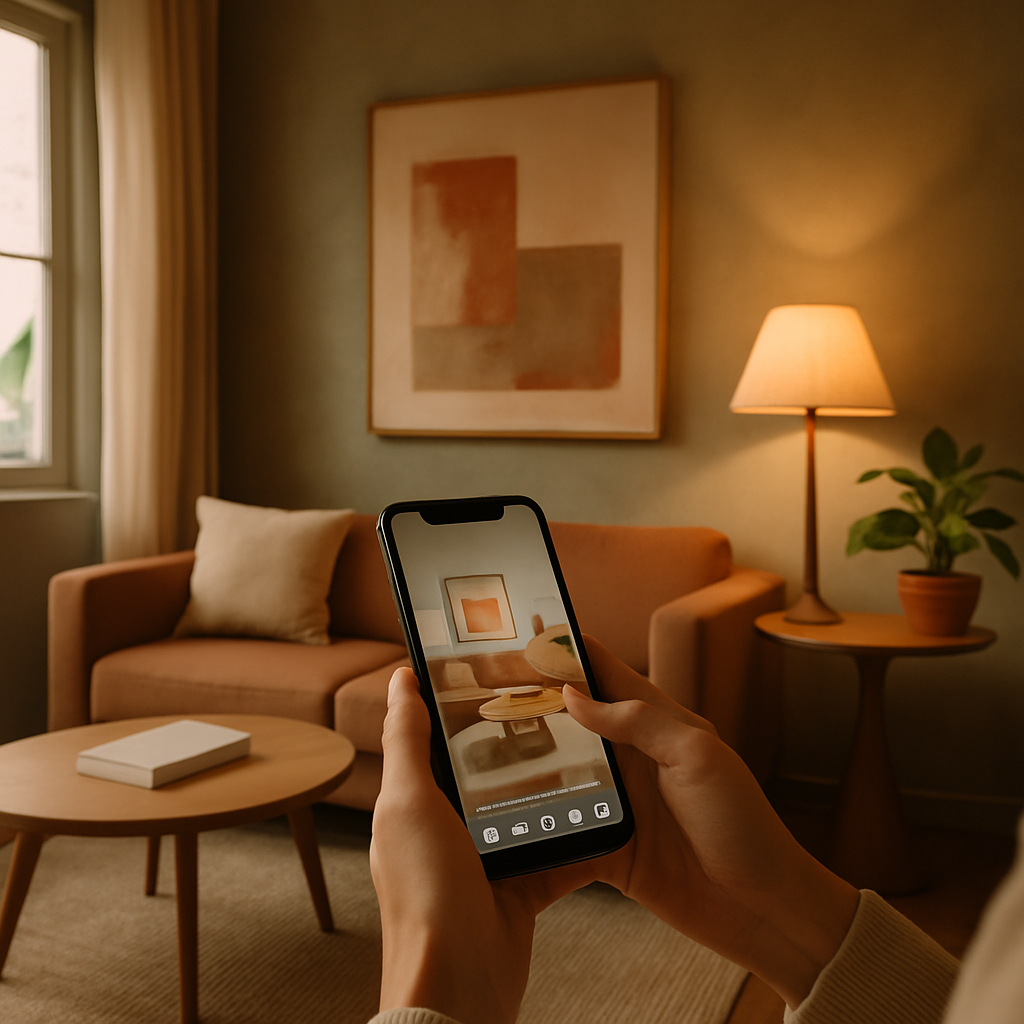
Augmented reality features transform a phone camera into a spatial preview tool that bridges the gap between on-screen planning and physical reality. The concept is simple: point your camera at an empty space and the app overlays a 3D model of a furniture piece at true scale. The execution has improved enormously since early implementations; current AR engines use depth sensors to anchor virtual objects to physical surfaces so they stay in place as you move the camera. IKEA Kreativ and Amazon's Room Decorator are two widely available options that tie AR previews directly to purchasable inventory, which means the virtual sofa you approve becomes the real sofa you order with a single tap.
For beginners, AR serves as a reality check on decisions made in the floor plan editor. A coffee table that looks proportionally correct in a 2D overhead view might feel too tall or too low when viewed at eye level through the camera. The discrepancy arises because floor plans compress the vertical dimension that AR restores. Walking around a virtual piece of furniture, viewing it from the doorway, from the seating position, and from across the room, reveals spatial relationships that overhead views obscure. AD PRO documented a case study where a homeowner used AR to discover that a pendant light specified in their floor plan would hang directly in the sightline between the kitchen and the living room, a problem that was invisible in the 2D layout but immediately obvious through the camera.
The practical workflow for a beginner combines floor plan editing with AR validation in alternating passes. First, arrange furniture in the app's floor plan view to establish positions and clearances. Second, switch to AR mode and preview the key pieces in your physical room to verify scale and visual weight. Third, return to the floor plan to adjust based on what the AR preview revealed. This back-and-forth process mirrors how professional designers work, alternating between plan view and perspective view to catch errors that one view alone would miss. Does the bookshelf you placed against the north wall actually block the afternoon light path from the window? AR shows you in seconds what a floor plan cannot reveal at all.
Budget Management and Smart Shopping Through Apps
Design enthusiasm without budget discipline leads to abandoned projects and financial stress. The best design apps embed budget tracking directly into the workflow so that every item added to a room plan carries a real or estimated price. Havenly generates itemized shopping lists with links to specific retailers, and IKEA Kreativ tallies costs in real time as users furnish a virtual room. For a beginner, the key discipline is setting a room budget before opening the app and treating that number as a hard ceiling rather than a flexible guideline. Professional projects typically cost between $5,000 and $15,000 per room for primary living spaces; a realistic DIY budget using retail furniture and self-installation might range from $1,500 to $5,000.
Smart shopping means understanding when to invest and when to economize. The "invest in what touches your body" heuristic is a useful starting rule: sofas, mattresses, office chairs, and dining chairs should receive the largest share of the budget because comfort directly affects daily quality of life. Decorative accessories, artwork, and accent pieces can be sourced inexpensively and swapped over time as your taste evolves. Design apps make this prioritization visible because the itemized cost breakdown shows exactly where money is concentrated. If the accent pillows and throw blankets cost more than the coffee table, the allocation is inverted and worth reconsidering.
Timing also matters. Major furniture retailers run predictable sales cycles: Presidents' Day, Memorial Day, Labor Day, and Black Friday typically offer 20 to 40 percent discounts on big-ticket items. NCIDQ-certified designers routinely advise clients to finalize their design plan two to three weeks before a major sale event so they can execute the shopping list at discounted prices without the pressure of making style decisions under a time constraint. An app-based design plan with a saved shopping list makes this strategy effortless; when the sale arrives, you already know exactly what to buy. Have you been delaying a purchase because you are unsure about the choice, or because you are waiting for a better price? The app resolves the first question so you can focus on the second.
Common Mistakes Beginners Should Avoid
The most frequent beginner mistake is designing for photographs rather than for life. A room that looks stunning in a rendered image may be impractical for daily use if every surface is white, every shelf is styled with objects that serve no function, and every seat is chosen for visual appeal over comfort. Design apps exacerbate this tendency because their output is inherently visual, a screen image that rewards aesthetic coherence. Counter this bias by mentally walking through your daily routine in the virtual room. Where do you set your keys when you enter? Where do you charge your phone at night? Where does the dog's water bowl go? If the design does not accommodate these mundane realities, it needs revision before any money is spent.
Another common mistake is ignoring vertical space. Beginners tend to think in floor plan terms, filling the ground plane with furniture while leaving walls bare from waist height to ceiling. Design apps with 3D views reveal this imbalance clearly: a room with heavy furniture and empty walls feels bottom-loaded and incomplete. Shelving, artwork, sconces, and tall plants draw the eye upward and create a sense of volume that horizontal furnishing alone cannot achieve. IIDA's residential design guidelines recommend that at least two wall elements in every room extend above the 60-inch line to prevent the visual weight from pooling at floor level. Toggle the 3D view in your app, rotate to a standing eye-level perspective, and notice whether the upper third of the room feels engaged or abandoned.
The third mistake is over-committing to a single design trend. Trends cycle faster than furniture wears out, and a room that is aggressively themed around a single aesthetic, whether that is industrial farmhouse or coastal grandmother, can feel dated within two to three years. A more resilient approach uses trendy elements in easily replaceable forms, such as cushion covers, art prints, and small accessories, while anchoring the room with classic silhouettes and neutral finishes that tolerate shifting tastes. Biophilic design is an exception to the trend-caution rule because its foundation, natural light, greenery, and organic materials, has remained appealing across every style cycle for decades. Prioritize what endures, and use the app to experiment with trend-driven accents that can be swapped without redecorating the entire room.
Conclusion
Interior design apps have lowered the entry barrier for home makeovers to the point where a complete beginner can produce a workable room plan in a single afternoon. The process follows a logical sequence: measure your room, create a digital shell, arrange furniture using traffic flow and proportion principles, test colors and materials, validate with AR, and manage the budget through integrated shopping tools. Each step builds on the previous one, and the app provides visual feedback that accelerates learning far faster than trial and error with real furniture and real paint.
Your immediate next step is to choose one room and commit to a single planning session of two to three hours. Download Planner 5D or Homestyler, enter your measurements, and start placing furniture. Do not aim for perfection; aim for progress. The confidence that comes from seeing your own room transformed on screen, even imperfectly, is the foundation for every decision that follows. Every professional designer started with a first room and a willingness to experiment, and the app in your pocket gives you a head start that previous generations of homeowners never had.


Comments
Post a Comment