Recessed Can Lighting Spacing Rules for Even Living Room Light
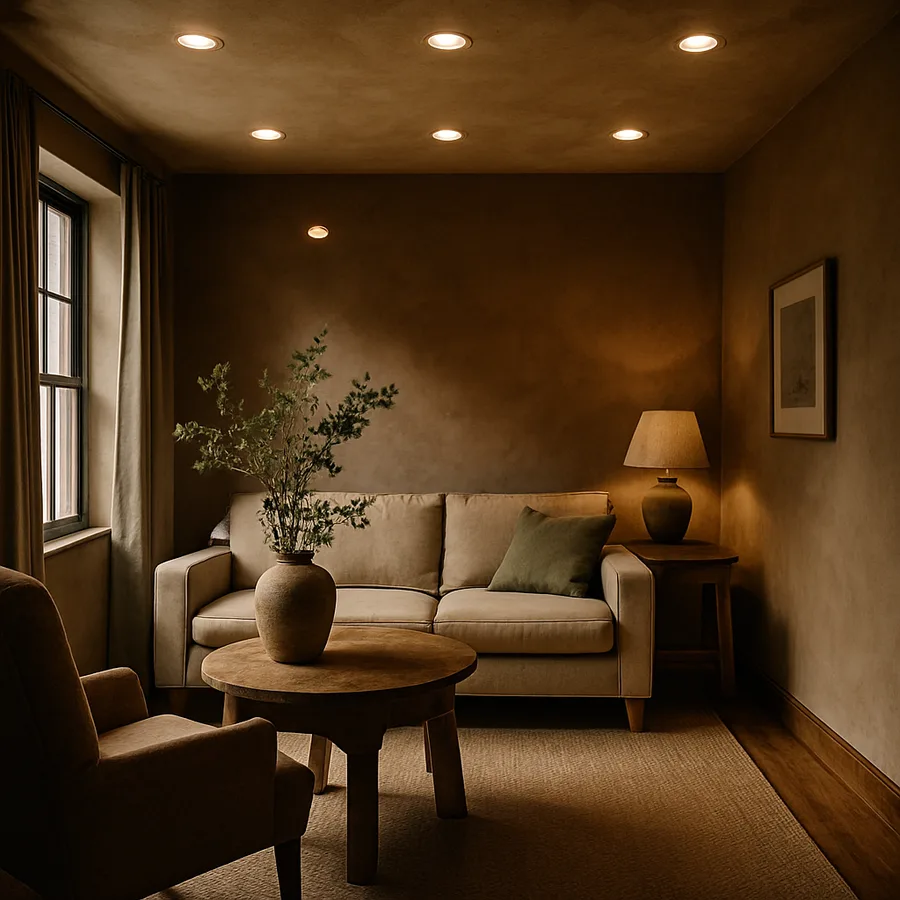
Even, glare-free living room lighting is one of those quietly difficult design problems. Too few cans and the room reads as a series of bright pools separated by gloom. Too many cans and the ceiling looks like a swiss cheese grid that flattens everything in the room into bland uniformity. The sweet spot is decided by a small number of measurable rules, and once you understand them, designing a layout becomes a fifteen-minute exercise rather than a guessing game. This guide walks through the math, the common variations, and the code constraints that turn a good plan into a permitted, finished install.
The Foundational Spacing Formula
The most reliable starting point for spacing recessed cans is the ceiling-height halving rule. Take your ceiling height, divide it by two, and use that figure as the maximum on-center spacing between fixtures. An 8-foot ceiling tolerates a 4-foot grid, a 9-foot ceiling supports 4.5 feet, and a 10-foot ceiling can stretch to 5 feet. This rule survives because it produces overlapping pools of light at the workplane, which the eye reads as continuous illumination rather than discrete spotlights.
The corollary rule applies at the perimeter. The distance from the wall to the first row of cans should be roughly half of the inter-can spacing, which for the 8-foot ceiling above means starting the first row about 24 to 30 inches off each wall. This margin keeps the wall faces lit (which is what makes a room feel large) without scalloping bright crescents directly against the crown molding.
According to a 2024 design survey published in Architectural Digest, more than 62 percent of homeowners who renovate their living rooms add or upgrade recessed lighting, making it the most-changed lighting category in residential remodels. The same survey notes that the most common complaint about existing installs is uneven distribution, almost always traceable to violations of these two rules.
One subtlety: the spacing rule assumes a flat, unobstructed ceiling. Beams, exposed ductwork, and structural soffits all bend the rule. When a beam bisects the room, treat each side of the beam as its own zone with its own spacing grid rather than carrying the grid across. Cans cut too close to a beam end up half-shadowed by the beam's mass, and the asymmetric pool reads as a mistake even to people who could not articulate why.
Grid Layouts vs. Asymmetric Layouts
A uniform grid is the safest bet for general-purpose living rooms because it produces predictable distribution and adapts to furniture rearrangement over time. The grid reads as architectural rather than fussy, especially in spaces with simple ceiling planes. Most living rooms between 180 and 320 square feet end up with a 3-by-3 or 3-by-4 grid, which lands six to twelve cans depending on dimensions.
An asymmetric layout makes sense when the room has a strong primary feature: a fireplace, a media wall, an art alcove, or a deep bay window. In these cases, you weight cans toward the feature rather than spreading them uniformly. A typical asymmetric pattern places three cans about 18 to 24 inches off the feature wall, plus a lighter perimeter scatter for general fill. The visual effect is more curated, but it constrains future furniture moves.
A third option, the perimeter-only layout, runs cans around the room's edge and leaves the center to a chandelier or pendant cluster. This works beautifully in formal living rooms with high ceilings and a strong central fixture, and it produces the gallery-like wall wash that flatters art and millwork. It does not, however, light a coffee table or reading chair well, so plan for table lamps.
Have you ever noticed that some living rooms feel calm even at full brightness while others feel busy? The difference is often layout symmetry. A grid that aligns to the room's primary axis (typically the longest wall or the fireplace centerline) reads as composed, while a grid rotated against any architectural reference reads as accidental. Before drilling, lay out the array on a scaled plan and check that every can either falls on the room's centerline or sits symmetrically about it. The few minutes of geometry pay off every time you walk into the finished space.
Lumen Targets and Fixture Counts
Spacing tells you where the cans go; lumen budget tells you how many you need. The Illuminating Engineering Society recommends an ambient illuminance of 15 to 30 footcandles for a residential living room used for conversation and television, with task pockets brought up to 50 footcandles by lamps. Translating this into total ceiling lumens, a 240-square-foot living room generally needs 6,000 to 9,000 lumens of usable downlight from the recessed array.
Modern residential LED downlights typically deliver 650 to 1,100 lumens per fixture in the popular 4-inch and 6-inch sizes. Doing the division, that 240-square-foot room lands somewhere between six and twelve cans, with the lower end being adequate and the upper end giving you headroom for dimming. Always size the array to dim down rather than struggle up, because the most flattering living-room setting is rarely full output.
Have you ever walked into a renovated living room that felt slightly off and could not say why? Most of the time the array is undersized by 30 percent and someone has compensated with cool-temperature lamps, which read as bright but produce an institutional feel. The American Lighting Association recommends staying at 2,700 to 3,000 Kelvin for living rooms regardless of how many cans you install, and adjusting fixture count rather than color temperature to hit the desired brightness.
Beam Angles and Ceiling Height
Beam angle is the most under-discussed variable in residential downlighting. A standard 40-degree beam works well at 8-foot ceilings and produces soft overlap at typical spacing. As ceilings rise to 10 or 12 feet, beam angle should narrow to 30 or 25 degrees, otherwise the same fixture count produces dim, washed-out illumination at the floor. Conversely, very low ceilings (under 8 feet) can use 50 to 60 degrees to broaden the spread and reduce the number of cans needed.
Ceiling height also affects fixture diameter. 4-inch cans look proportional in 8- to 9-foot rooms and read as restrained and modern. 6-inch cans hold up better in 10-foot-plus rooms where the ceiling plane is large enough to accept the larger aperture without looking crowded. Mixing diameters within a single living room rarely works; pick one and commit.
For sloped or vaulted ceilings, the rules shift slightly. Use sloped-ceiling-rated trims (often called gimbal or eyeball trims) and aim each can perpendicular to the floor rather than perpendicular to the ceiling. Spacing should be measured along the slope, not on plan, otherwise the ground projection of each beam becomes lopsided. Vaulted layouts almost always need 20 to 30 percent more cans than flat layouts of equivalent floor area, because the optical distance is longer.
Avoiding Glare and Hot Spots
Glare is the silent killer of an otherwise correct layout. The most common cause is shallow trim depth combined with a high-output lamp, which leaves the bare LED visible at typical seated viewing angles. The fix is a deep-regress trim with the lamp recessed at least 1.5 inches above the ceiling plane, often called a 3- or 4-inch baffle in product catalogs. The visual difference between a glare-free deep regress and a flush builder-grade trim is dramatic, and the cost difference is typically modest.
Hot spots occur when the array is laid out without considering primary furniture. A common mistake is placing a can directly above the seating area such that anyone leaning back looks straight up into the lamp. The cure is to offset cans by 18 to 24 inches from the centerline of seats, so the beam falls on the floor between conversation pieces rather than on the heads of the people sitting.
Many readers ask whether to add cans above the coffee table for reading. The honest answer is that table-level reading is better served by table lamps, and cans above the table tend to glare off the table surface and into eyes. Reserve recessed lighting for ambient fill and let portable lamps handle task work. This division of labor is the single most reliable way to make a living room feel layered rather than over-lit.
Another underused tactic for glare control is zoned dimming. Group the cans into two or three switched zones (perimeter, center, and feature wall, for example) and put each zone on its own dimmer. The added wiring complexity is modest, but the result is a living room that can transition from full evening reading levels to a soft conversation glow with a single rotation of one dimmer. Whole-array dimming is fine, but zoned dimming is what separates merely correct lighting from genuinely flexible lighting that adapts to every activity the room hosts.
Code, Insulation, and Air Sealing
Recessed cans interact with attic insulation, fire ratings, and air infiltration in ways that the National Electrical Code and most state energy codes regulate carefully. The two specifications you must match to your install context are IC rating (insulation contact, required for any can with insulation overlap above the ceiling) and airtight rating (often labeled IC-AT, required by current energy codes in most jurisdictions for cans installed in insulated ceilings).
If you are remodeling and the existing cans are non-IC older fixtures sitting in an insulated attic, replace them. Non-IC cans require an air gap around the housing that increases attic heat loss by a measurable margin and, in worst cases, has been associated with attic fires when insulation drifts back over the can. Modern IC-AT-rated LED can-and-trim assemblies resolve both problems and typically cost between $25 and $80 per fixture in residential grades.
Wiring should be run on a 15- or 20-amp circuit dedicated to lighting where possible, with the array controlled by a single dimmer that is rated for the LED count and brand of your lamps. Confirm dimmer compatibility against the fixture manufacturer's published list. The most common installation failure is a flickering array on a dimmer that is technically rated for LEDs but not validated for the specific driver. A two-minute compatibility check beforehand prevents an afternoon of troubleshooting after the ceiling is closed up.
For retrofits in finished ceilings, choose canless LED disks rather than traditional housing-and-trim assemblies wherever possible. Canless designs install through a single 4- or 6-inch hole, weigh under a pound, and connect to the supply via a small junction box mounted above the ceiling. They eliminate most of the bulky aluminum housing that complicates retrofits in joist bays with limited clearance, and they ship with the lamp pre-integrated, so dimming compatibility is decided at purchase rather than at install. The price gap between canless and traditional has narrowed sharply in the last three years.
Conclusion
A correctly spaced array of recessed cans is one of those design decisions where math and aesthetics align cleanly. The ceiling-height halving rule sets your maximum spacing, the perimeter half-spacing rule handles the edges, the lumen budget sets your count, and the beam angle tunes overlap to the room's height. Get those four right and the layout works regardless of style, from minimalist contemporary to traditional millwork-heavy interiors.
The decisions that follow, beam angle and trim depth and color temperature, are mostly about feel rather than function. They are the difference between a room that lights its purpose and a room that flatters its inhabitants, but they only matter once the underlying geometry is correct. Skip the geometry and no amount of lamp upgrade will rescue the result; nail it and even modest lamps will look intentional.
Treat the ceiling plan as a piece of architecture in its own right. Sketch the array on a scaled drawing of the room, mark every fixture relative to walls, beams, and HVAC registers, and verify that no can collides with a joist or duct before you cut. The few extra minutes at the planning stage save hours of patching and rerouting later, and they produce a ceiling that looks composed rather than improvised.
If you are starting a renovation this season, commit to drawing the lighting plan before you commit to the furniture plan. Lighting is the layer of the room people feel most strongly without consciously noticing, and getting it right is the single largest contributor to how the finished space reads. Your living room will repay the careful planning every evening it is occupied.
More Articles You May Like


Comments
Post a Comment